Configuring Publisher Verification in Azure Active Directory
Learn what the publisher verification status is, and how to set it up in your organization. Azure AD comes with Consent Policies, enabling your organizations to only trust verified publishers. Users will then only be able to consent to applications that are verified.
During Microsoft BUILD 2020 virtual conference, Microsoft announced the preview of the Publisher verification features in Azure Directory.
In this post, you learn how to make use of Publisher verification in your organization both as Application Developers and as organizations with users who use Applications (the consumers).
As quoted from Microsoft:
When an application is marked as publisher verified, it means that the publisher has verified their identity using a Microsoft Partner Network account that has completed the verification process and has associated this MPN account with their application registration.
- Microsoft Docs.
We'll touch on these things in this post:
- Some simplified use cases.
- Configure Publisher Verification for your Apps. This section is for the application developers and vendors who offer apps.
- Configure Consent Policies in your organization. This section is for the organizations that want to restrict to what type of app users can consent.
Use cases
There are many reasons you'd want to be a verified publisher if you build apps. However, the other side of the coin is equally important when your users are consenting to applications left and right.
Use case: For app developers and publishers
When you publish applications for others to consent, you're asking them to trust you, your organization, and your code.
If we are a Microsoft Partner company, we can now tie our MPN ID to our Azure AD applications. Next time someone is consenting to your application, they can see that this application is a verified publisher - something that can only work if you have completed the MPN verification process, and are a Microsoft Partner.
Bottom line: You are not a random publisher that someone should trust. You have gone through the partner verification process's hoops and loops, and you are a legitimate business.
Use case: For the enterprises
You can configure Consent policies in Azure now, and based on the publisher's verification status, you can automatically accept or reject any application consent request.
For example, you can ensure that all users across your organization can only consent to verified apps.
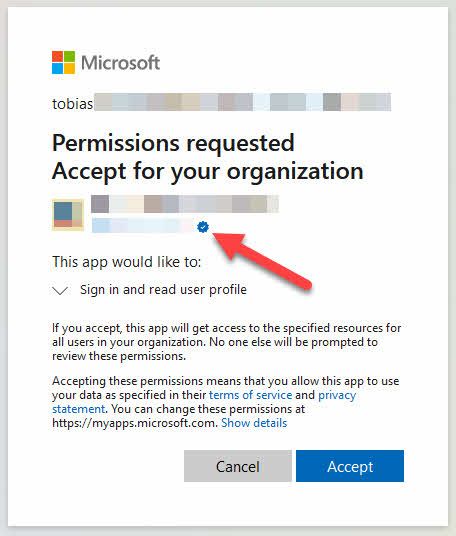
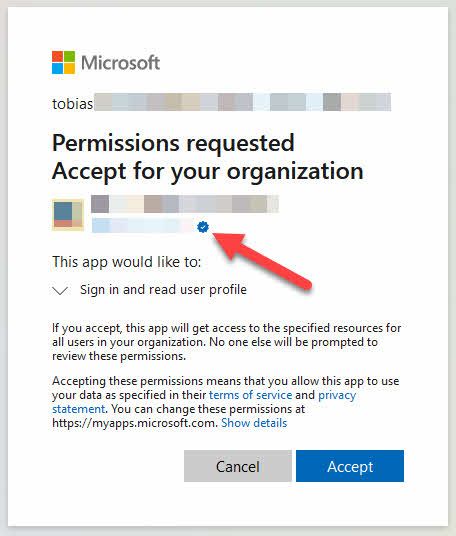
Users in your organization can more easily distinguish applications that are "Verified." They will see a blue badge next to the application name and logo.
Set things up in Azure
Okay, we have decided that we should go down the route of enabling this functionality, both as app developers and as consumers of applications. Let's take a look at how we can do that from both sides.
Configure Publisher Verification for your Apps
In Azure Active Directory, where you have your apps, you can now configure the Publisher verification option.
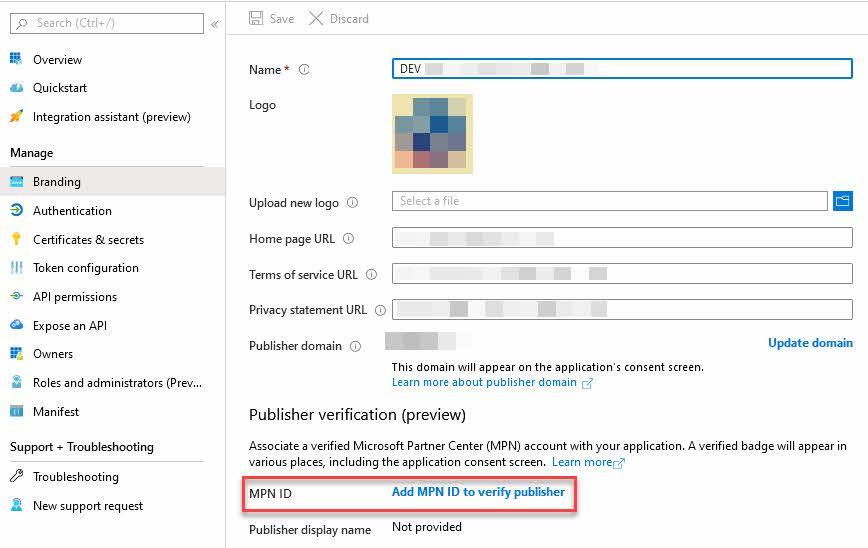
Head over to your application, select Branding, and view the Publisher verification section. You should see that you can enter an MPN ID to tie your app to a given Microsoft Partner.
Doing this ensures that a "Verified" badge appears in the consent screen, which we'll take a look at further down in this post.
First, click Add MPN ID to verify publisher:
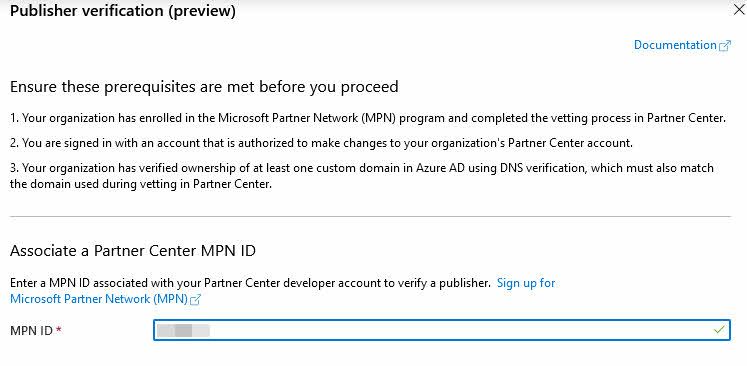
Next, enter your MPN ID:
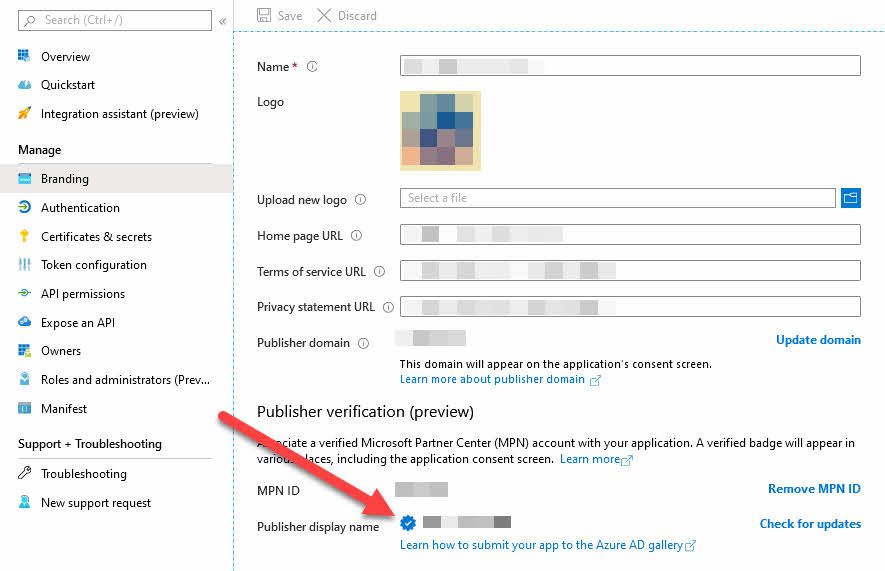
There's a shiny blue badge now next to the company name, indicating that you're a verified publisher.
From the user perspective, this changes things as well. We see the blue badge next to the company name, indicating that this app we're trying to consent to comes from a verified publisher:
Configure Consent Policies in Azure
You can now control in your organization whether to trust unverified applications.
Select among these user consent options:
- Do not allow user consent.
- Allow user consent for apps from verified publishers for selected permissions.
- Allow user consent for apps.
Select among these Group Owner consent options:
- Do not allow group owner consent.
- Allow group owner consent for selected group owners.
- Allow group owner consent for all group owners.
Here's the current incarnation of the UI:
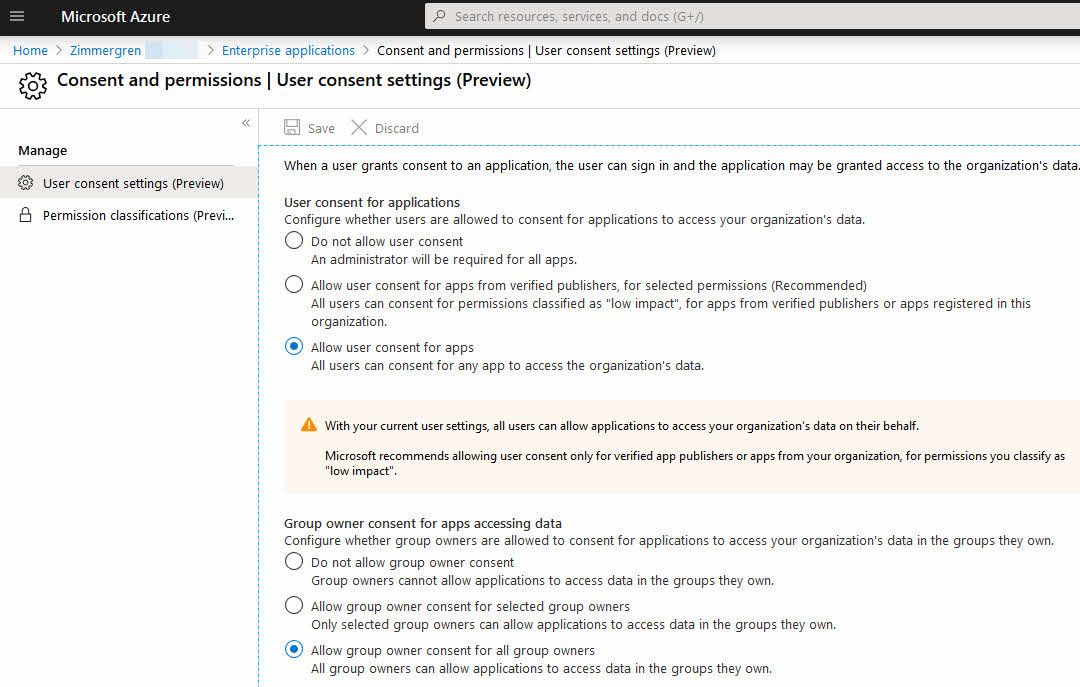
For testing purposes, I am changing to Allow user consent for apps from verified publishers, for selected permissions (Recommended). When selecting this option, it presents you with a new option to granularly select the permissions to classify as low-impact.

Click the link or go to the left menu and select "Permission classification." From there, you can more granularly select what permissions you determine to be low-risk access permissions.
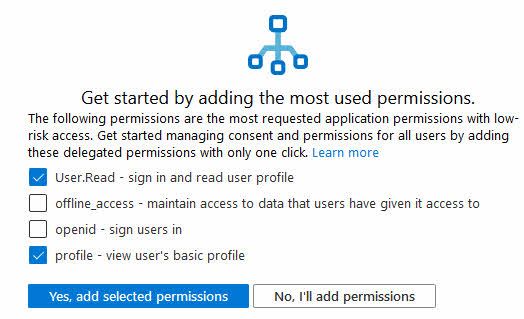
When we've configured this, we can go back to the User consent settings page and ensure that the configuration is there:

Summary and links
I'm glad you made it to the end. This post briefly walks through the steps required to configure Publisher Verification as a vendor, and how to configure Consent policies as an organization consuming applications.
NOTE - Not an indicator for security and quality
I also want to highlight the fact that anyone can become a verified publisher. This is not an indication that the application quality is sound, nor that the application does what it says it does. The publisher verification simply ties an application to a trusted Microsoft partner company. If the application then misbehaves, its outside the scope of the verification.
For additional information and learning more, head on over to some of the recommended links:
- Publisher Verification (Microsoft)




Recent comments