Visual Studio
Find content related to Microsoft Visual Studio in this category.

The New Microsoft - Visual Studio Community, Open-Source .NET, Expanded Xamarin Partnerships and more Paid Members Public
One word. WOW. I am glad I chose to work with Microsoft technologies back in the day when I had to choose the direction for my professional career. I started with .NET back in 2001 and have been full-time developing solutions and systems based on Microsoft technologies for a long

Getting Started with Application Insights with Visual Studio 2015 for your ASP.NET Web Applications Paid Members Public
> Disclaimer: This post was written 2014-11-13, while the Application Insights were still in Beta/Preview. Changes will most likely happen, and therefore some information below may have changed by the time you read this. Introduction to Microsoft Application Insights One of the really cool features that was recently announced
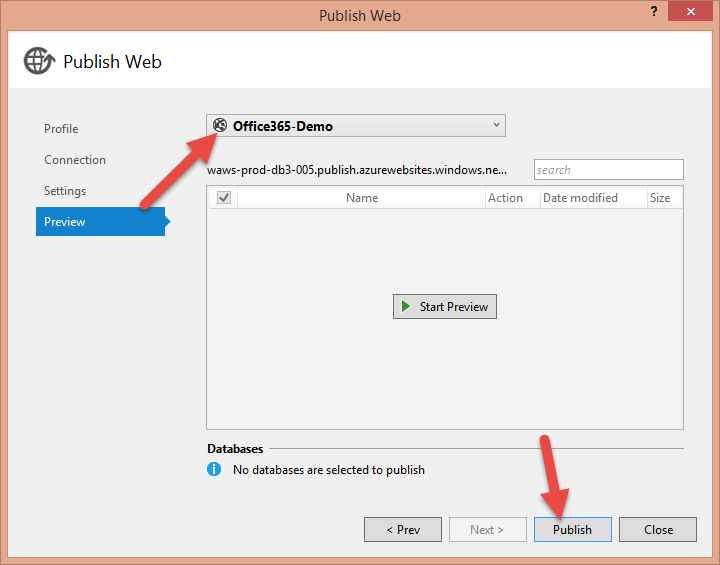
Getting started with Office 365 development - Part 4 - From development to production: Publish your app to Windows Azure Web Sites Paid Members Public
This article is part of a series about “Getting started with Office 365 development”. * Part 1 – Setting up your environment [https://zimmergren.net/technical/getting-started-with-office-365-development-part-1-setting-up-your-environment] * Part 2 – Communicate with the Exchange REST API [https://zimmergren.net/technical/getting-started-with-office-365-development-part-2-communicate-with-the-exchange-rest-api] * Part 3 – Building a sample Web Forms application that integrated with Offi
CKS : Developer Tools – A tool for your toolbox Paid Members Public
If you’re a seasoned SharePoint developer, you probably have a good set of tools that you’re working with on a daily basis. Some of my all-time favorites include: * WSPBuilder [http://www.wspbuilder.com/] * SharePoint Manager [http://spm.codeplex.com/] * ReSharper [http://www.jetbrains.com/] * Reflector Pro [http://www.
WSPBuilder - Walkthrough of the Visual Studio Add-in Paid Members Public
Alright. People have approached me lately and asked me if I could give them a brief introduction to the WSPBuilder extensions available for Visual Studio. Instead of taking all those discussions on one by one, I’ve decided to document some of the main features here. If I’m missing
Visual Studio extensions for Windows SharePoint Services – 1.3 Paid Members Public
What is VSeWSS? VSeWSS is a plugin to Visual Studio that adds a set of functionality which may help you in your daily tasks as a SharePoint developer. The plugin comes with a basic set of templates, and a great set of functionality which I’ll try to outline here.
Microsoft Visual Studio 2010 and the .NET Framework 4.0 – CTP – Download now! Paid Members Public
What is this? You can now download a CTP of Visual Studio 2010 and .NET 4.0 from Microsoft’s download center. Fetch the link in the bottom of this article to download! > “Microsoft Visual Studio 2010 and the .NET Framework 4.0 are the next generation development tools


Recent comments