SP 2010: How To - Relational lists in SharePoint 2010
One of the new cool things in SharePoint 2010 is the fact that we now have relational lists. In my previous article about List Joins, I talked about how you programmatically can fetch and join information from more than one list with the improved SPQuery object.
In this article I will give you an overview of what capabilities you get out of the box when installing SharePoint 2010 – in terms of relational data in lists.
Relational Lists in SharePoint 2010 – Overview
By utilizing Lookup fields in SharePoint 2010, we can enforce a relationship behavior that we previously would have to work very hard to achieve.
Microsoft have now provided us with a few new options when working with Lookup Fields:
- Joins between lists
- Projected Fields
- Relational integrity
Joins between lists
As mentioned, we have the capability to create relationships between lists in SharePoint 2010. This is quite easy to do using the browser UI, which I will soon demonstrate step-by-step.
Projected Fields
With projected fields we have the capability to pull information from a parent list into the view of the child list.
This basically mean that you can reference and display information from a parent list, in your child list. The fields are Read-Only but enables you to get a much nicer joined view.
Relational integrity
With SharePoint 2010 and relations in lists, you would of course wonder how it handles the relational integrity. E.g. what happens if I delete or try to delete something in the parent list?
There’s two relational integrity options:
- Restricted delete
Restricted delete enables you to enforce a behavior that means that you can’t delete any items that have relations from the list. E.g. if the item you’re trying to delete have a bunch of child-items, you cannot delete them. - Cascade delete
Cascade delete on the other hand, means that when you’re trying to delete an item which has relations – it’ll delete the related items as well.
Delete and Recover related items – Recycle Bin
A question I got the other day was:
"If I delete an item in my parent list and have cascading delete so all my child items are deleted, how do I restore them if I made a mistake?"
Quite simple my dear Watson, you utilize the recycle bin. When you delete an item using Cascading Delete, the item and it’s related items are placed in the Recycle Bin. From there you can obviously easily recover the items as well. This is what an item with relations looks like in the recycle bin.
Step by step – Do it yourself
Alright – so we’ve covered some of the basics of relational lists, nothing fancy. But now we want to create some lists and have relationships between them – so let’s get on with it!
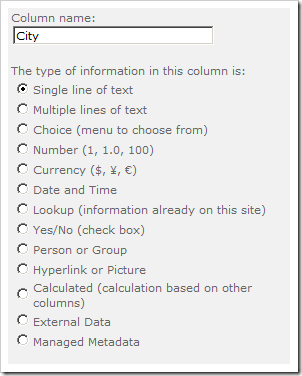
- Create a parent list
Create a new Custom List named "ParentList"
Create a new Coumn in that list as per the following settings:
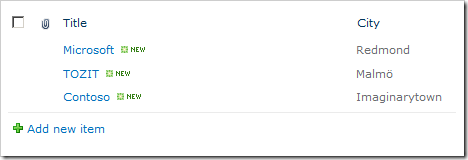
Add some sample items in the list like this:
Create a child list
Create a new Custom List named "ChildList"
Create a new Column in that list as per the following settings:
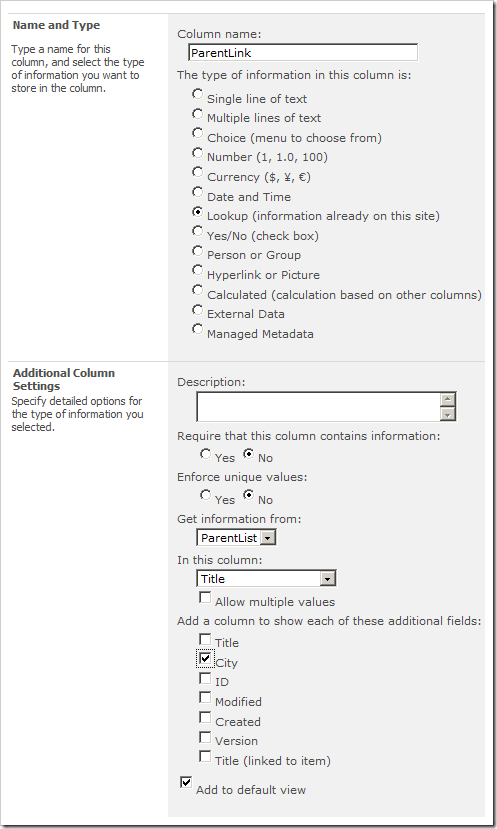
Please note that I checked the City checkbox. This will create a Projected Field against the lookup automatically so you can view that information which exist in the parent list – directly in the child list.
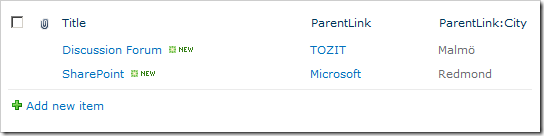
Test out the projected fields functionality
Add some new items in the ChildList to see that when you add an item and choose a company from the ParentList it will automatically show the projected field ("City") as a read-only field in the child-list:
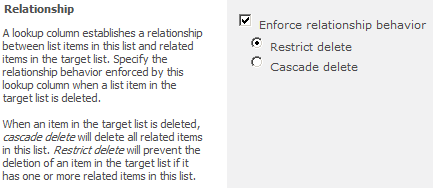
- What about enforcing relational behavior?
I’m glad you asked. When you create (or change settings for) a lookup field (like the "ParentLink" field), you have the ability to change settings for the relational behavior.
Go to your "ParentLink" column, or when you create a new lookup field – and see the following dialog:

From this dialog as you can see, you have the ability to make the necessary settings for your fields.
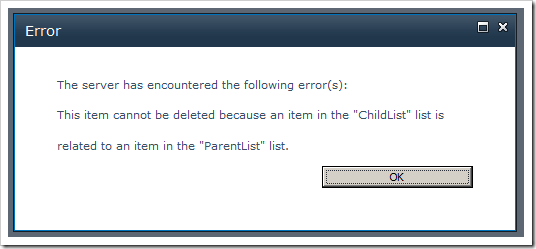
Restricted Delete
If you choose the "Restricted Delete" option, you will see the following behavior when trying to delete an item that has related items:
Cascade Delete
If you choose the "Cascade Delete" option for your lookup field instead, you’ll be sending the items directly to the Recycle Bin instead. Then it’ll look like this in the recycle bin:
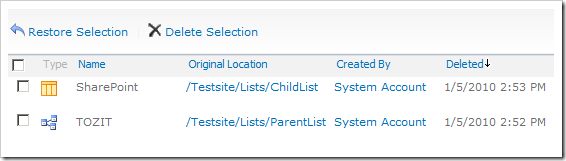
Note, that you have the icon that looks like a relational diagram in your recycle bin – this means that you’ve deleted an item that may have deleted linked items. If you restore this item (in our case, TOZIT) it will automatically restore all of the items that were originally deleted.
So, we have the kind of enforced relationships we’ve longed for since the dawn of days!
Summary
Voila. Easy as 1-2-3, you have created two very simple lists and created a relationship between them – and optionally you can enforce this relationship using the "Enforce relationship behavior" settings for Restrict Delete or Cascade Delete.
Enjoy!


Recent comments