This article will talk a little bit about how to get started with the new Azure Container Services (AKS). In recent months I’ve put quite some efforts into AKS and put it through the ring of fire and rigorous tests. So far, so good.
With my R&D I’ve found some gotchas and had to figure quite some things out, but in the end the setup and configuration is pretty straight forward - and the preview of AKS has significantly improved since I started using it.
In this post I will cover:
- Ramp up with pre-requisites (Azure CLI, AKS CLI, Logging in to Azure CLI, etc..)
- Creating a private repository with Azure Container Registry (ACR)
- Enable Admin Access to the ACR
- Tagging your image and prep to push it to your new repository using the credentials mentioned above
- Create an AKS Cluster using the Azure CLI
- Connect and browse your cluster using the Azure CLI and the Kubernetes Dashboard
- Define a Deployment in YAML which describes our simple container setup
- Scale nodes in and out using the Azure CLI
Pre-requisites
Install Azure CLI & AKS CLI
Installing the Azure CLI can be done in a few ways, and depends on your preference and also on which operating system you’re rolling with.
Read here for the latest instructions for your operating system: https://docs.microsoft.com/en-us/cli/azure/install-azure-cli?view=azure-cli-latest
Login to Azure CLI
Once you’ve installed the Azure CLI to your machine, we can start using it. We’ll need to login to Azure before we can do anything else, so let’s do that right away.
Run this command:
az login
You will get some instructions to visit aka.ms/devicelogin and enter a code, which you’ll see in your cmdline interface. Once this is done, it will look similar to this:
C:\Code\Containers (develop)
λ az login
To sign in, use a web browser to open the page https://aka.ms/devicelogin and enter the code A4P4WJGME to authenticate.
[
  {
    "cloudName": "AzureCloud",
    "id": "GUID (redacted)",
    "isDefault": true,
    "name": "CloudAwesome Subscription",
    "state": "Enabled",
    "tenantId": "GUID (redacted)",
    "user": {
      "name": "tobias.zimmergren@REDACTED.onmicrosoft.com",
      "type": "user"
    }
  }
]
Creating an Azure Container Registry
We’ve successfully logged into our Azure subscription using the CLI. Time to create our Azure Container Registry. We can do this in various ways, including from the CLI or from the Portal. Since we’ll be using the CLI for most of the things in this post, that’s how I’ll demo it.
Run this command with your desired variables for name and resource group:
az acr create --name MyFantasticRegistry --resource-group MyContainerRegistryResourceGroupNameHere --sku Basic --admin-enabled true
NOTE: I’m also setting the flag —admin-enabled true, which will ensure that we can access the ACR using the admin credentials which we’ll get in the next step.
Please note, if you don’t have a resource group to put the container registry in, you can create one easily like this:
az group create --location westeurope --name MyContainerRegistryResourceGroupNameHere
Get the Azure Container Registry Admin Credentials to access the cloud registry
There’s multiple ways to get the Admin credentials for your ACR, but the easiest is using the CLI and then it’s using the Portal. I’ll show both approaches here, and you’ll use the one that best fits your preference.
2018-01-23: Updated info about Role Based Access Control and ACR
After I wrote the draft for this post, an update was published in the Docs about support for RBAC (Role Based Access Control), so you can essentially assign the Reader role of the ACR repo to your current account, and you’ll be able to pull and push using your own credentials.
When you log in with az acr login, the CLI uses the token created when you executed az login to seamlessly authenticate your session with your registry. Once you’ve logged in this way, your credentials are cached, and subsequent docker commands do not require a username or password. If your token expires, you can refresh it by using the az acr login command again to reauthenticate. Using az acr login with Azure identities provides role-based access.
Also, using this approach we can skip the creation of a docker secret containing the credentials. So, probably a better choice to do things with the RBAC approach now. The following sections are still here in case you’re keen on using the other approaches, of course.
Get ACR admin credentials using CLI
(Only do this if you didn’t do the RBAC approach)
In order to continue with the simplicity of using the Azure CLI, we can with a single command get the credentials (username/passwords) for the Azure Container Registry. Here’s the CLI cmd:
az acr credential show -n myfantasticregistry
The output will be showing your username and passwords in clear text in the console like this:
{
  "passwords": [
    {
      "name": "password",
      "value": "REDACTED"
    },
    {
      "name": "password2",
      "value": "REDACTED"
    }
  ],
  "username": "myfantasticregistry"
}
Make a note of the credentials, you’ll need it in the next steps.
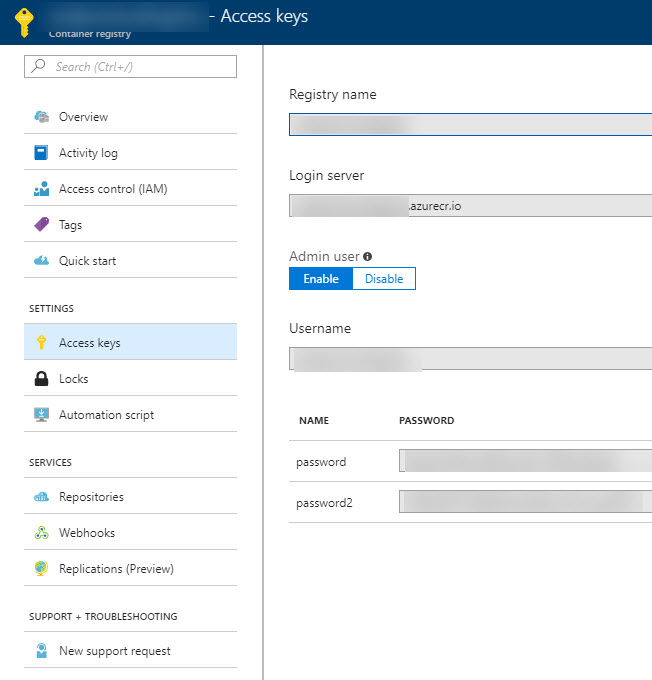
Get ACR admin credentials using the Azure Portal
(Only do this if you didn’t do the RBAC approach)
If you’re more inclined on using the Azure Portal, you just go to your Azure Container Registry and select Access Keys and then copy the Username and Password/Password2.
Login to your Azure Container Registry then Tag and Push your image to ACR
In this post I will not elaborate on how to build your docker images.
First off, remember the username/password I mentioned in the previous step? This is where you’ll use them.
docker login myfantasticregistry.azurecr.io --username USR --password PASS
If you’ve built your docker image locally, you should be ready to tag it and then push it.
docker tag yourthing/yourimage:version myfantasticregistry.azurecr.io/yourthing/yourimage:version
docker push myfantasticregistry.azurecr.io/yourthing/yourimage:version
NOTE: In production I’m using VSTS and build automation for things like this, but for the sake of demonstrating it, it’s a bit easier to do it cmdline from the local box.
Create an Azure Container Service (AKS) using the Azure CLI
Next up, where the fun begins! We’ll set up our AKS cluster through the Azure CLI and it’s pretty straight forward. Follow along for the ride.
Create Resource Group for AKS
We’ll need to specify a resource group to put our AKS in, and since I like organized boxes of functionality and separation of concerns, I’ll be creating a new resource group using the Azure CLI:
az group create --location westeurope --name MyResourceGroupName
Create AKS Cluster using Azure CLI
Next up, create the AKS cluster and specify the resource group name you created above. I’ve specified that I want the D2_v2 VM size and that the name of the cluster should be MyAksClusterName. As always I get good performance in westeurope so I’ll continue to use that.
az aks create -g MyResourceGroupName -n MyAksClusterName --location westeurope --node-vm-size Standard_D2_v2
While I’ve redacted some sensitive details, the response after it’s done should look something like this:
{
  "id": "/subscriptions/GUID/resourcegroups/MyResourceGroupName/providers/Microsoft.ContainerService/managedClusters/myaksclustername",
  "location": "westeurope",
  "name": "myaksclustername",
  "properties": {
    "accessProfiles": null,
    "agentPoolProfiles": [
      {
        "count": 3,
        "dnsPrefix": null,
        "fqdn": null,
        "name": "nodepool1",
        "osDiskSizeGb": null,
        "osType": "Linux",
        "ports": null,
        "storageProfile": "ManagedDisks",
        "vmSize": "Standard_D2_v2",
        "vnetSubnetId": null
      }
    ],
    "dnsPrefix": "myaksclustername-redacted-0f24e6",
    "fqdn": "myaksclustername-redacted-redacted.hcp.westeurope.azmk8s.io",
    "kubernetesVersion": "1.7.7",
    "linuxProfile": {
      "adminUsername": "azureuser",
      "ssh": {
        "publicKeys": [
          {
            "keyData": "ssh-rsa REDACTED"
          }
        ]
      }
    },
    "provisioningState": "Succeeded",
    "servicePrincipalProfile": {
      "clientId": "REDACTED (guid)",
      "keyVaultSecretRef": null,
      "secret": null
    }
  },
  "resourceGroup": "MyResourceGroupName",
  "tags": null,
  "type": "Microsoft.ContainerService/ManagedClusters"
}
Connecting to your AKS Cluster using the Azure CLI
Normally I want to start by getting the credentials to the cluster, which you can do like this:
az aks get-credentials -g MyResourceGroupName -n MyAksClusterName
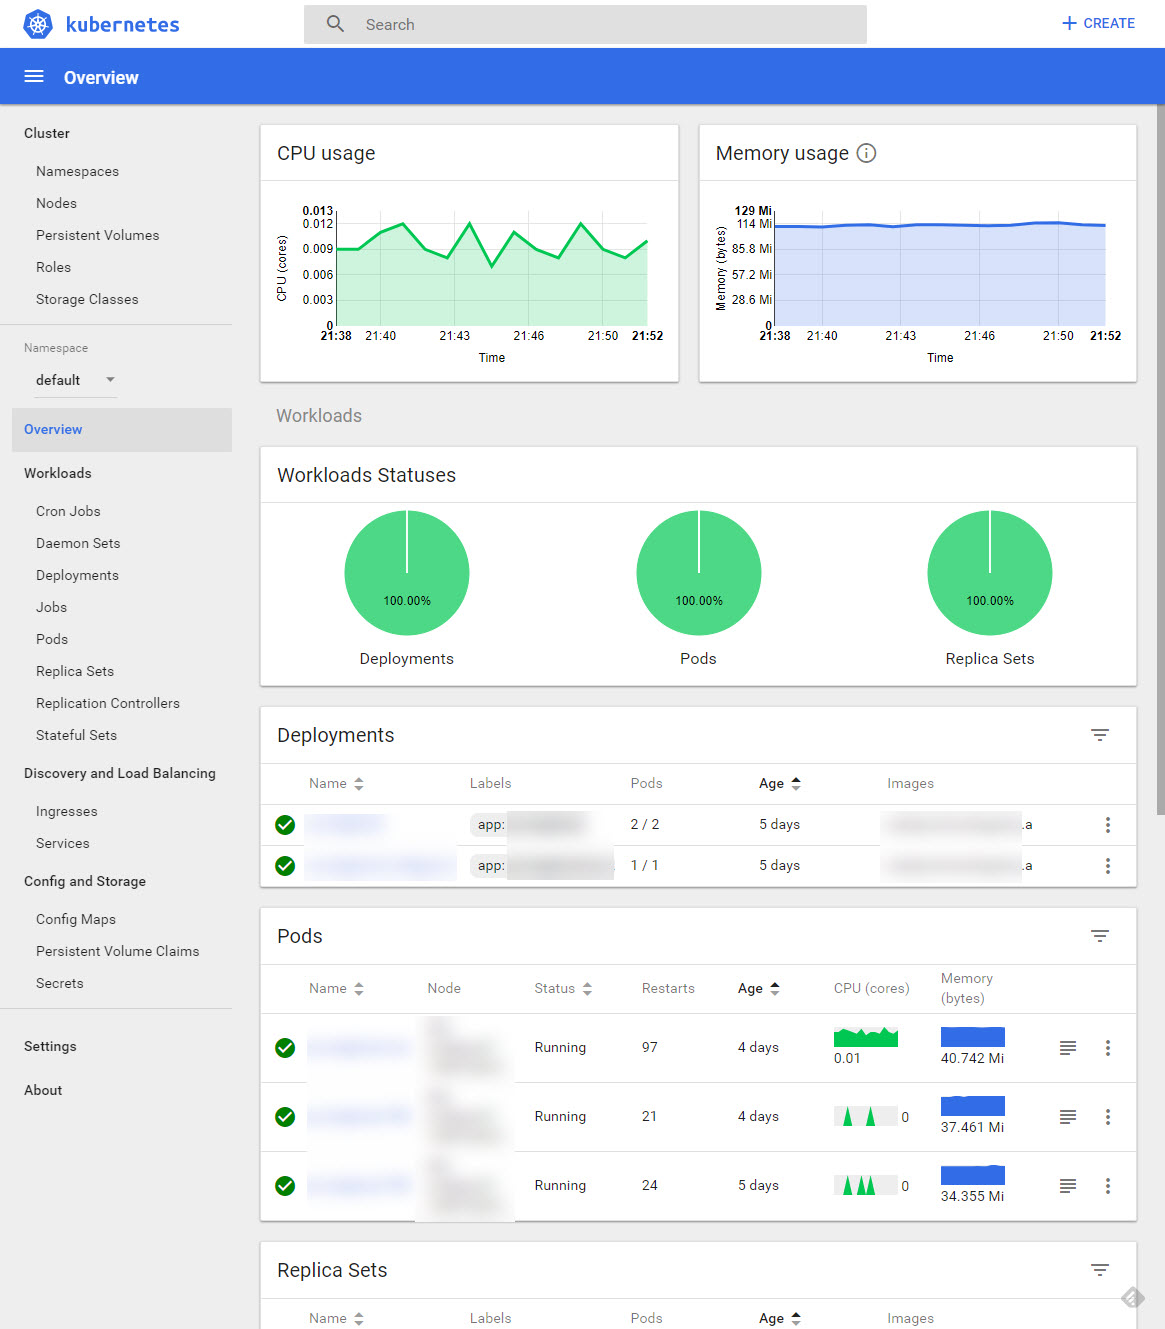
This gives you a connection to the AKS cluster, and you should be ready to launch the dashboard to check things out. This is a good first step to ensure things look good, and to familiarize yourself with how Kubernetes look and work.
The output of the command usually looks like this:
> az aks get-credentials -g MyResourceGroupName -n myaksclustername
Merged "myclustername" as current context in C:\Users\tobia\.kube\config
Connect to Kubernetes Dashboard using the Azure CLI
Still pretty straight forward. Run this command and you’ll be up and running:
az aks browse --resource-group MyResourceGroupName --name MyAksClusterName
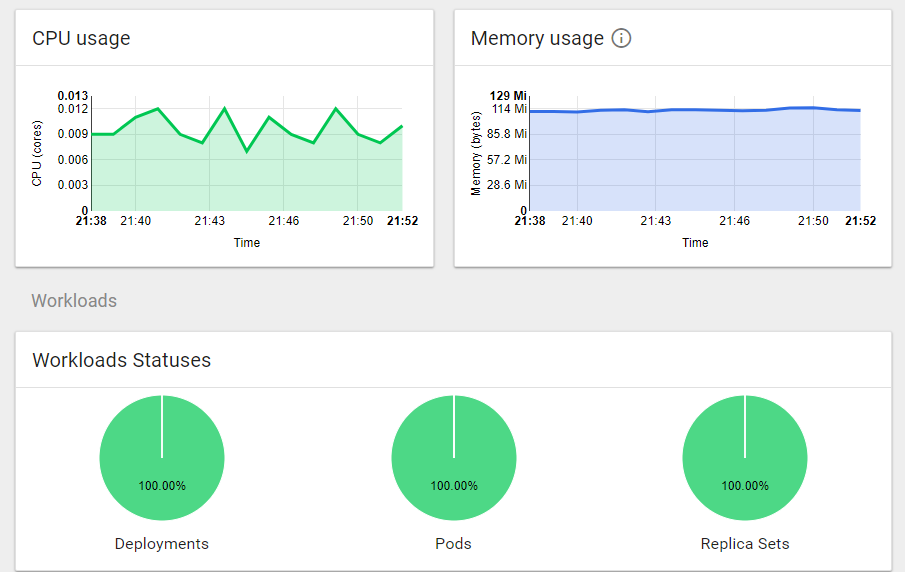
It will let you browse your new AKS cluster through the Kubernetes Dashboard:
Creating a Docker Registry Secret to be used in the Cluster (If you -didn’t- do the new RBAC approach)
(You only need to do this if you didn’t do the RBAC approach)
Since we’re going to connect to a privately-hosted repoistory, we’ll need to ensure we can set that connection up. If you did not do the RBAC approach for some reason, here’s the details to manually set the connection up by creating an image pull secret.
kubectl create secret docker-registry pull-secret-1 --docker-server=myfantasticregistry.azurecr.io --docker-username=USERNAME --docker-password=PASSWORD --docker-email=tobias@zimmergren.net
Please note that in the above command, the name of my secret is pull-secret-1 for the sake of clarity. Make a note of whatever you enter here, as it’ll be needed in the yml file when we define the services.
Verify secret using kubectl
In order to verify that the secret was successfully created, you can verify it:
kubectl get secret pull-secret-1 --output=yaml
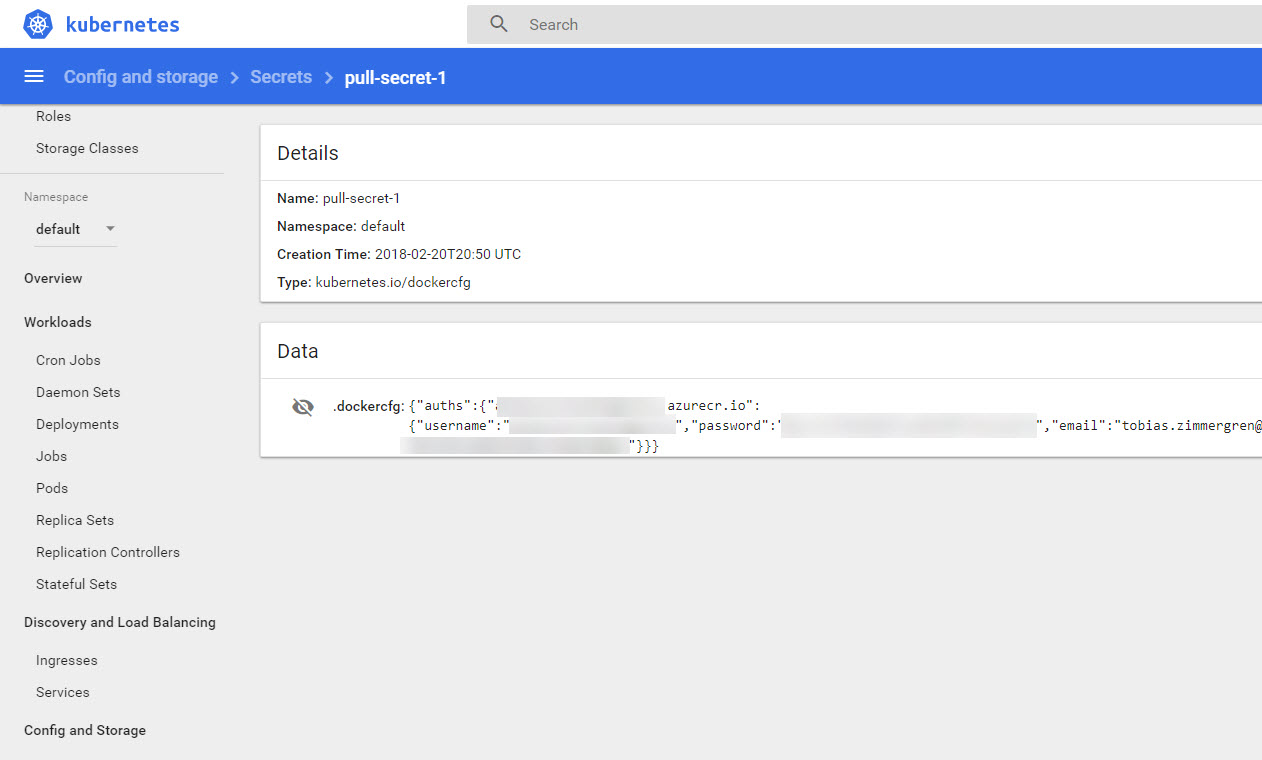
Verify secret using the Kubernetes dashboard
To visually confirm that the secret was added, you can see it from the dashboard (use the aforementioned az aks browse command above to access it) - in the left nav you can see there’s a Secrets menu option. Click it to see the secret being added to the cluster:
Define a Deployment and get our service running
In order to get our image into a service and running, an easy way in Kubernetes is to create a deployment. I’ll not go into details about the deployments here since it’s documented pretty well already. Take a look here: https://kubernetes.io/docs/concepts/workloads/controllers/deployment/
My sample application is defined like this:
apiVersion: apps/v1beta1
kind: Deployment
metadata:
  name: main-worker
spec:
  replicas: 2
  template:
    metadata:
      labels:
        app: main-worker
    spec:
      containers:
      - name: main-worker
        image: myfantasticregistry.azurecr.io/yourthing/yourimage:12121
        env:
        - name: MyEnvironmentVariableExample
          value: "This is the value of the environment variable. Magic."
      imagePullSecrets:
      - name: pull-secret-1
Please note in the above simple Yaml file that I’ve specified the imagePullSecrets property, with one secret defined which has the same name as the secret I just created above. This enables the pods that are launched through this deployment to access the private repository using the credentials you’ve provided when creating the secret. But again, this is not required if you’ve chosen the more up-to-date RBAC approach.
Deploy the new service (YML file) to your cluster
Now that you’ve created this yaml file, simply create the deployment by executing the kubectl create command and point to the file:
kubectl create -f yourfile.yml
It’ll execute instantly and then you’ll be able to see it either through the Kubernetes CLI, or directly in the Kubernetes Dashboard.
Summary
Well, that’s a wrap for this time. It’s not too tricky to get up and running with AKS, and since I started writing this post there’s already been quite some enhancements including support for RBAC for the Azure Container Registry and also several new updates to Kubernetes and AKS, which you can upgrade to. A separate post will detail how to upgrade an AKS cluster.

Comments are closed