My intention is to get a SharePoint / Silverlight article series going, and this is to be the first article in the series – How to get up and running!
Prerequisites
- WSS 3.0 or MOSS 2007
- Visual Studio 2008 SP1
- Visual Studio 2008 SP1 Tools for Silverlight
- Silverlight 2.0 SDK
- A .xap file you want to use in your Web Part
- Visual Studio 2008 Extensions for SharePoint
Note: I’m not going to describe how you create a .xap file – you’ll find plenty of resources for that on the net. Just go google! (Live.com, yeah!)
Nice to have:
- Expression Blend 2 (Design tool for Silverlight and WPF applications) - With SP1
- Silverlight Toolkit
Part 1 – Step by step to configure your SharePoint environment for Silverlight 2.0
First of all, if you don’t want to do the manual .NET 3.5 settings in your web.config – there’s a great feature to take care of this on CodePlex which can be found under the Features project.
Step 1: Download, install and deploy the .NET 3.5 Web Config feature
- Download the .NET 3.5 web.config feature from here
- Install the .wsp into your SharePoint environment
- Deploy the .wsp into your SharePoint environment to the appropriate Web Application
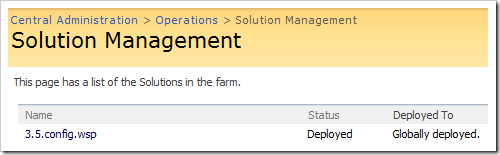
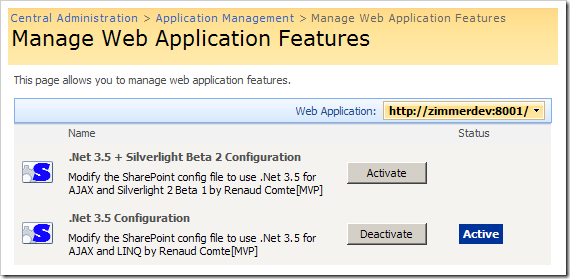
- Activate the feature for your Web Application (the one you deployed to)
(This is done from Central Administration – Application Management – Manage Web Application Features)
Now we’re all set with the pre-configurations of the web.config – though there’s one more thing we need to manually do.
Step 2: Adding the final touches to web.config manually
Since the features project doesn’t include Silverlight by default (except for the Beta 2 version, which we’re not interested in..) you should now open up your web.config manually and
- add the following line to ** :
It should look something like this:

Step 3: Add System.Web.Silverlight.dll to the GAC (Global Assembly Cache)
Add the System.Web.Silverlight.dll to the Global Assembly Cache (either drag’n’drop it into C:Windowsassembly or use Gacutil.exe or use the default .NET Configuration Tool)
You’ll find the System.Web.Silverlight.dll assembly in the Silverlight 2.0 SDK folder, located here:
C:Program FilesMicrosoft SDKsSilverlightv2.0LibrariesServer
Step 4: Set the correct MIME-type for the Silverlight .xap filetype
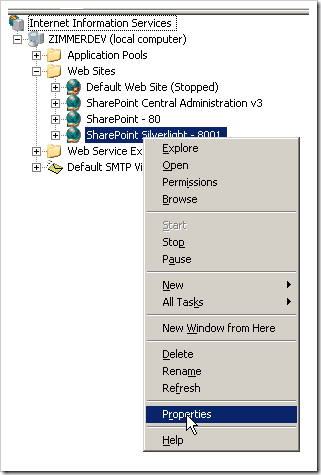
Go to your IIS management console (Start – Run – “inetmgr” without the quotes)
- Select your Web Application from the list, and select properties:
- Choose “HTTP Headers” and then “MIME Types…”
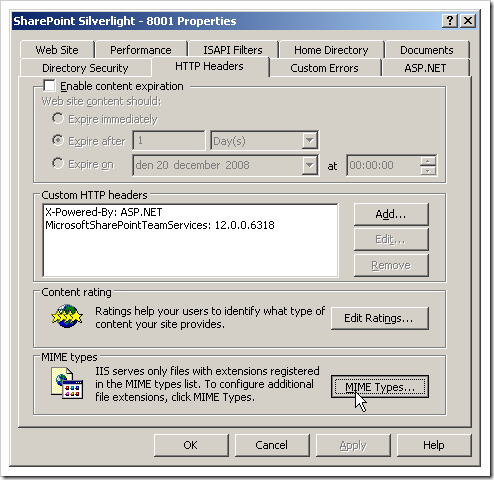
- Add the MIME-type for Silverlight 2.0 Applications as shown:

- Okay, Okay, Okay (Press the buttons..)
- Close the IIS manager as we will not need it anymore for the time being!
Now when all those fancy-pancy things are done – let’s get rolling with creating a simple Hello World Web Part using Silverlight 2.0, shall we?
Part 2 – Creating a first Web Part to host a Silverlight application
If you’ve read this far you should now be set up properly to create a Silverlight Web Part (Really, a Web part that loads the silverlight application and renders in the browser)
Step 1: Visual Studio 2008 time!
First of all, make sure you’ve got the .xap file in handy, then launch Visual Studio 2008 SP1.
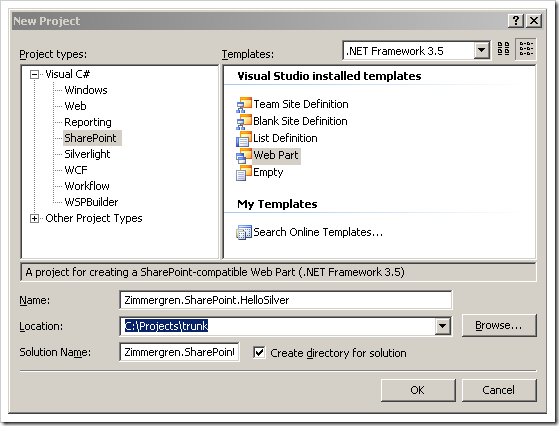
- Create a new Web Part project in your desired fashion – I’m using the WSS Extensions for ease:
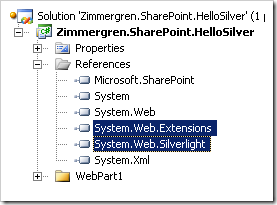
- Add a reference to the System.Web.Silverlight assembly and to the System.Web.Extensions assembly, it should look something like this:
Add the following using statements:
Note: I’ve stripped down the default using statements, as they’re overkill for this – this is what you should need
using System.Runtime.InteropServices;
using System.Web.UI;
using System.Web.UI.WebControls;
using System.Web.UI.WebControls.WebParts;
using System.Web.UI.SilverlightControls;
Make an override on the OnInit method (We will dynamically add a ScriptManager to the current page, if there’s not one already):
protected override void OnInit(System.EventArgs e)
{
    base.OnInit(e);
    var sm = ScriptManager.GetCurrent(Page);
    if(sm == null)
    {
        var scriptManager = new ScriptManager();
        scriptManager.EnablePartialRendering = true;
        Page.Form.Controls.AddAt(0,scriptManager);
    }
}
Write the following very simple code to load a Silverlight class into the Web Part, set it’s source to our .xap file and simply add it to the controls collection:
private Silverlight mySLControl;
protected override void CreateChildControls()
{
    base.CreateChildControls();
    mySLControl = new Silverlight
    {
        ID = "HelloSilverlightControl",
        Width = new Unit(367),
        Height = new Unit(150),
        Source = @"/_layouts/ZimmerLight/Hello/Hello.xap"
    };
    Controls.Add(mySLControl);
}
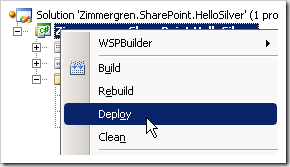
- Build and deploy the Web Part, and cross your fingers!
(Using the WSS Extensions for Visual Studio, just rightclick the project and choose Deploy)
Step 2: Add the Web Part to a page
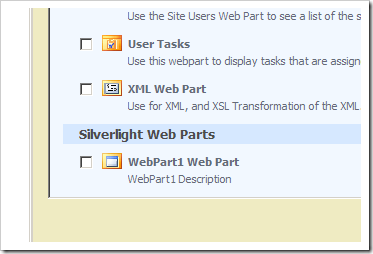
- I’ve put my Web Part in a “Silverlight Web Parts” group – simply choose it and click add.
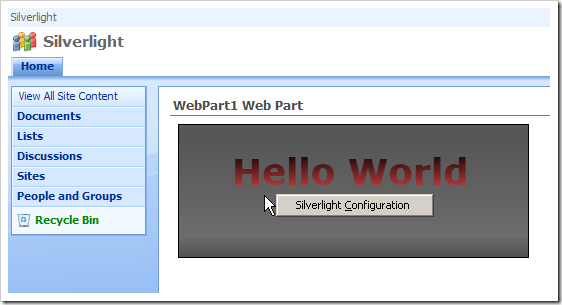
- Voila, a fully functional Silverlight 2.0 Web Part rendered inside SharePoint – without any trouble!
Summary and Download
As you’ve seen in this article, it isn’t too hard to get up and running with Silverlight 2.0 (and .NET 3.5 of course) and get our first Silverlight 2.0 Web Part spinning in SharePoint.
You should now be able to:
- Configure your environment to use Silverlight 2.0
- Hook up your Silverlight Application(s) in SharePoint
- Enjoy the richness of Silverlight in SharePoint!
This project is deprecated. You can no longer download it.


Comments are closed