Introduction
In this article I’ll walk you through how to set up a Docker Swarm in Azure through the Docker Cloud service.
There’s plenty of places to host your docker containers, in this post I’m covering the Docker Cloud option with the Swarm Mode on Azure. I will soon post a few guides for ACS (Azure Container Service) and AKS (Managed Kubernetes on Azure Container Service) which also touches upon how to deploy and host your containerized solutions in the Azure cloud.
For the sake of this post, I’ve created a super-simple console application that outputs messages to an Azure Storage Table. Given the complexity of the workloads I’m otherwise working with it feels like a good idea to simplify it a bit. Hopefully I can cover a more in-depth post about the inner workings of what we’re working on at a later time :)
Download the docker sample app from my github repo.
Link: https://github.com/Zimmergren/netcore-azure-dockerswarm-dockercloud/
Sample application overview
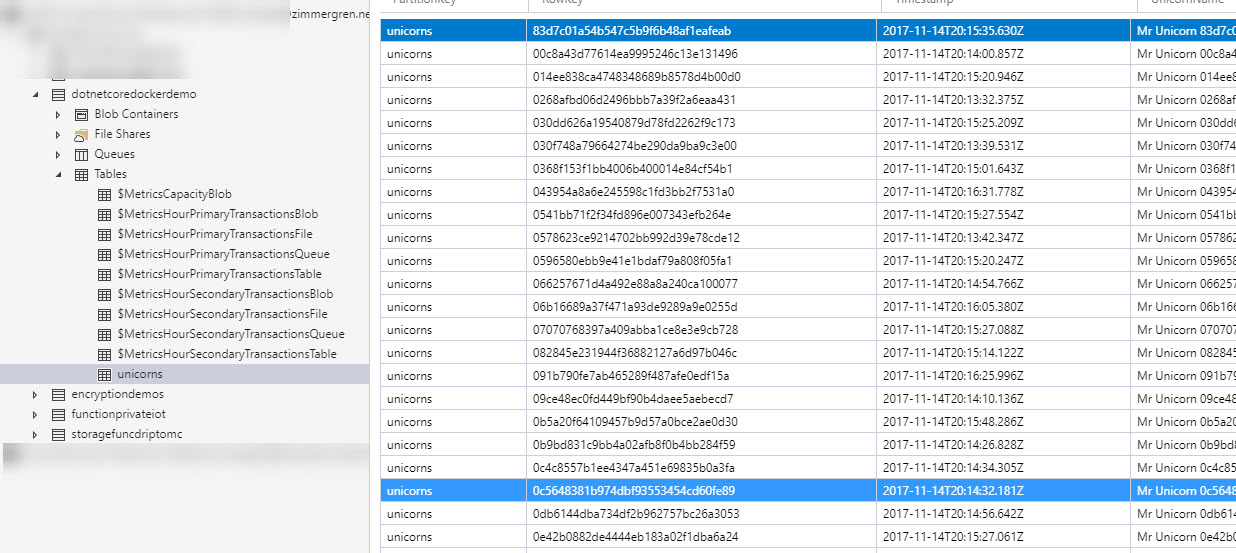
Since this is a very simple way to demonstrate the key scenarios in this article, the application has one job: Insert a row in a table in Azure Storage. Simple.
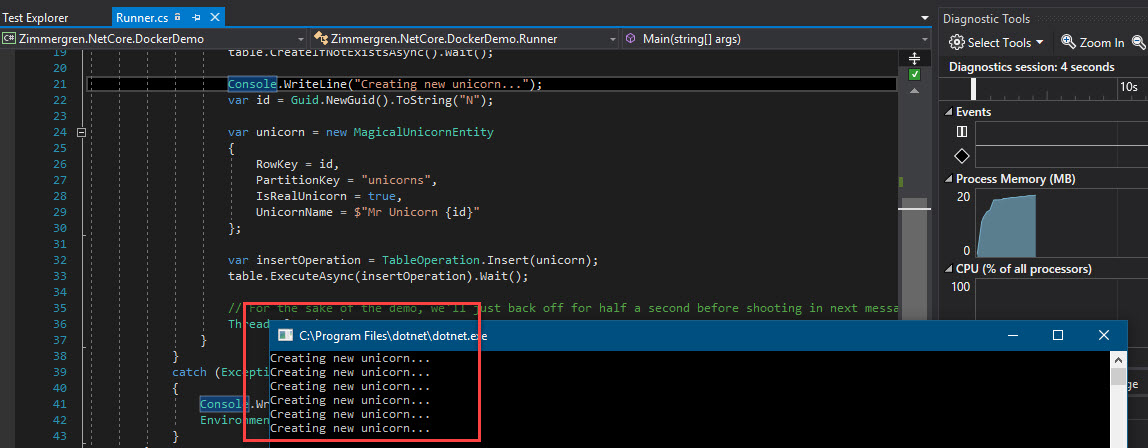
The result is simply a few rows inserted into Azure Storage synchronously like this:
Pre-requisites
- An account with Docker Cloud - https://cloud.docker.com
- An empty repository at the aforementioned Docker Cloud (mine is called
unicorn-runner) - An Azure subscription at https://azure.microsoft.com
- An application to put in a docker container (for examplemy sample application)
- Docker for Windows, Docker for Mac or other version from https://docker.com
- Connect your Docker Cloud account to your Azure Subscription (see next header in this post)
1 - Connect Azure to your Docker Cloud
Since this is well documented already, I will not dig deeper into the details of it. Check the following document and follow their descriptions:
- Link to Azure: https://docs.docker.com/docker-cloud/infrastructure/link-azure
- Add the Management Certificate to the new Azure subscription (allow Docker Cloud to manage Azure for us)
- Enter the subscription ID in the box, and hit save.
- Docker Cloud and Azure should be connected.
2 - Prepare the containerized application
I will not go into details about how to convert old apps into a container-capable application, but that’s essentially what I’ve done in our projects. Possible I’ll cover that in a different post, as there’s quite some gotchas (unless you’re going with the “everything is easy in a sandbox environment hype” that goes into all the marketing material ;-).
So, for the sake of this post I’m using the sample application I mentioned above.
This application is based on .netcore and is hosted inside a linux container.
3 - Build the docker image
I’ve configured a docker compose file for my images, which also helps when I have multiple images I want to start at once locally. In this demo we’ll be using a single image only to keep everything at the very basic level. If you want more in-depth posts, give me a ping in the comments section and I’ll be sure to post something for you.
3.1 Explore the docker definitions
For this project I’ve got two important files that dictates how I will containerize and run my application.
File: docker-compose.yml below contains the docker compose definition, essentially pointing to my docker file, and explaining what I want to do. I’ve created a new service called unicorn-runner which is the docker container image I’m creating, which will run my application.
version: '2'
services:
  unicorn-runner:
    build:
      context: .
      dockerfile: ./docker-runner.dockerfile
    restart: always
    stdin_open: true
    mem_limit: 25m
Next, I’m defining the dockerfile which is where I’m telling it what image to base the new image off of. I’m using the microsoft/dotnet:1.1.2-runtime image from the https://hub.docker.com/r/microsoft/dotnet/ Docker Hub.
I’m also telling it to copy the contents from the publish folder, which contains the binaries and dependencies for running my application, and I’m finally specifying how to launch the appliation (being .net core, you just call it with dotnet <your application dll>).
In a real-world scenario, you would likely not want to publish the bin/debug version of your application to a production environment, but it will suffice for this demo.
FROM microsoft/dotnet:1.1.2-runtime
WORKDIR /app
COPY ./Zimmergren.NetCore.DockerDemo/bin/Debug/netcoreapp1.1/publish .
CMD ["dotnet", "Zimmergren.NetCore.DockerDemo.dll"]
3.2 Build the application, build the docker image
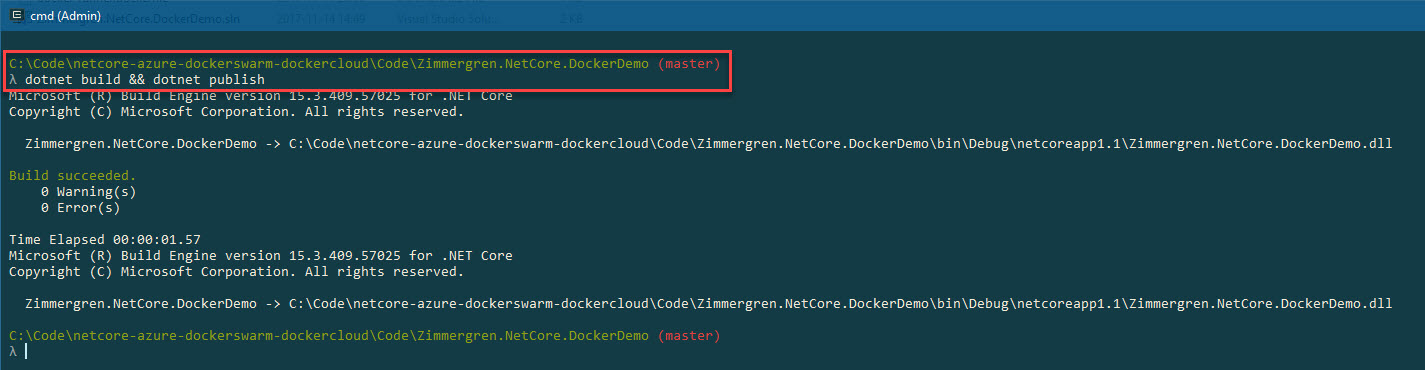
Firstly, we have to build the .net core application and publish the dependencies.
We’ll do this from the project root:
dotnet build && dotnet publish
Next, we should be ready to build the docker image. You’ll stay in the same folder that you were (project root) since this is where my docker files are located. Now, run this:
docker-compose build
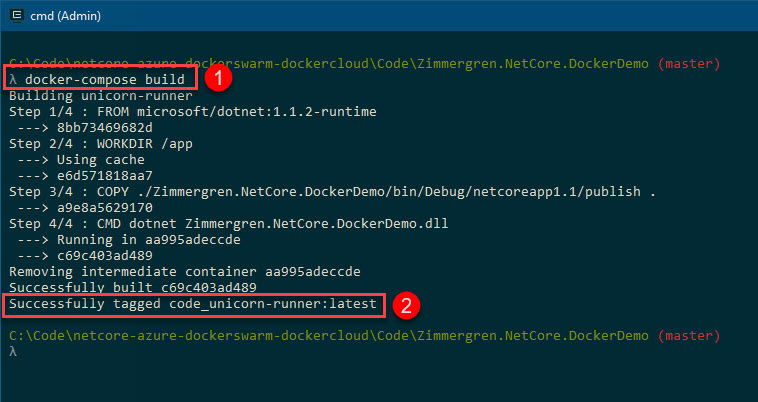
In the result of this command we can see:
- The command we execute
- Docker has tagged our new image as
foldername_servicename:version(If you’re asking where the wordcodecomes from, it’s the folder where the docker files are)
Before we push the new image up to the cloud repository, let’s just check that it works on our machine by using docker-compose up:
docker-compose up
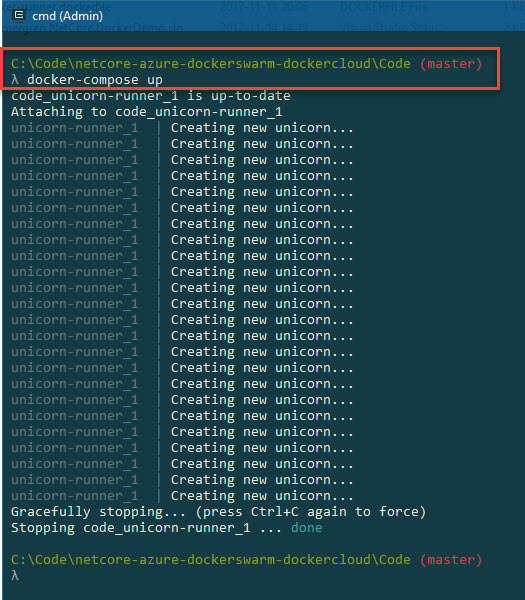
We can see that we get the correct output as when running the console app locally from Visual Studio (if you tried that).
To shut it down again, you can use docker-compose down, or if you’re attached to the console just hit Ctrl+C for a graceful shutdown.
So, we’re running a containerized version of our application in a local docker container and we can tell it to run with the aforementioned command. There’s actually quite some things we can explore from here, but that’s for another post.
One final thing which might be beneicial to know, is that you can very easily scale this application already on your localhost dev box. Just specify the --scale flag when running:
docker-compose up --scale unicorn-runner=20
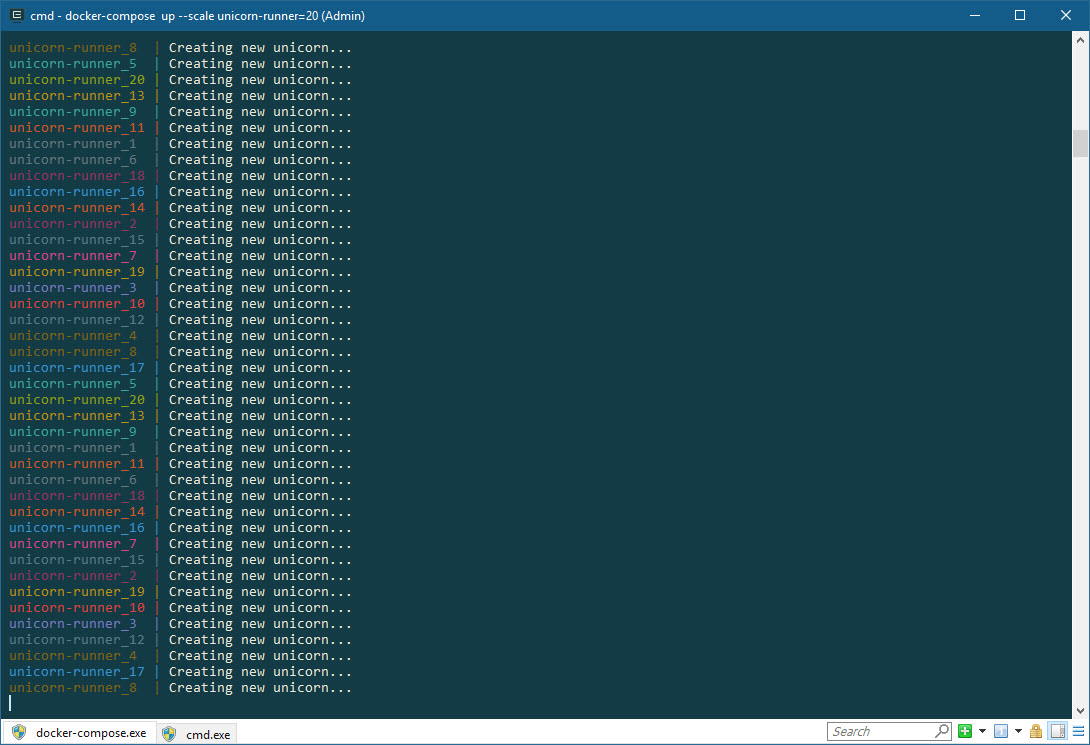
This would scale it to 20 containers, running simultaneously and (with the current application) output a lot more messages to the table in azure. Simple but efficient scaling - giving you control of the infrastructure, should you require some heavy processing on a scaled out architecture.
Alright, at this point we have a working .NET Core application, and it’s running inside a docker container (or multiple, if you want to scale it locally). But to build onto this story, we want to shoot this up into the cloud and let it sit on a different architecture. Let’s try that in the next sections.
4 - Push the docker image to a repository
Since this post handles Docker Cloud and running a Swarm through that, I’ll be pushing my image to a repository in my Docker Cloud account.
If you’re using a different repository, that’s also fine, just ensure you know the steps to push your code to it; and to know how your docker swarm later can pull it down. Using Docker Cloud, this is already automated for us so all we need to do is to push the image, then we can start using it from our cluster, but more on that in a bit.
- Login to Docker Cloud
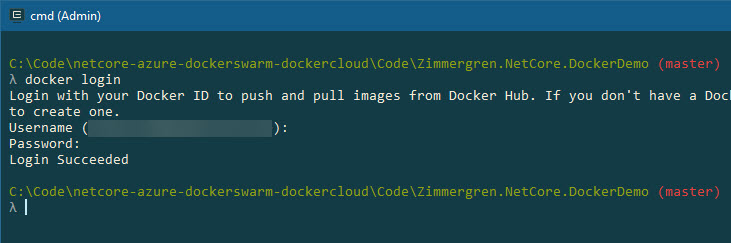
First, we’ll need to login to Docker Cloud:
docker login
The output should be Login Succeeded:
λ docker login
Login with your Docker ID to push and pull images from Docker Hub. If you don't have a Docker ID, head over to https://hub.docker.com to create one.
Username: zimmergrenawesomesause
Password:
Login Succeeded
- Tag the image you built previously
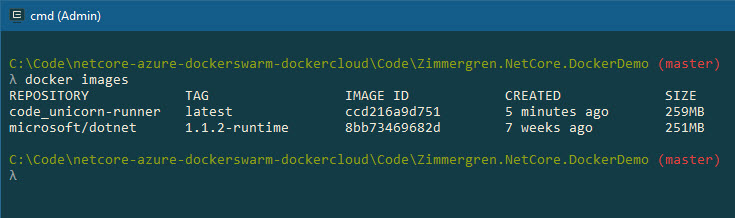
See your images with this command:
docker images
The image name foldername_imagename comes from the foldername combined with the image name.
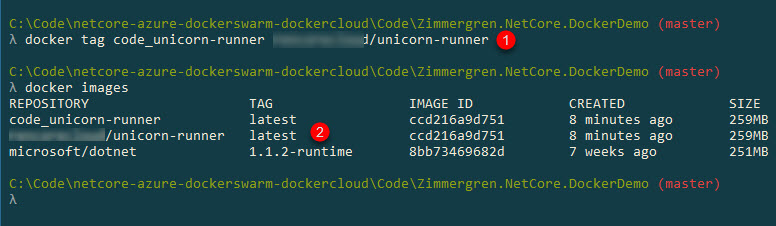
So, let’s put a tag on it:
docker tag code_unicorn-runner yourrepository/unicorn-runner
This will tag the image according to the same name my repository is named.
Note: I’ve obfuscated the details of my image repository in the below steps. Use the name of your own repository when performing these commands.
- We tag the image with the same name as our repository (which we now have access to since we used
docker loginpreviously) - We check the images we have locally, and can see we’ve got a new one labeled
yourrepository/unicorn-runner
Now, if you run docker images again you’ll see that it’s listed here.
docker images
- Push images to the repository
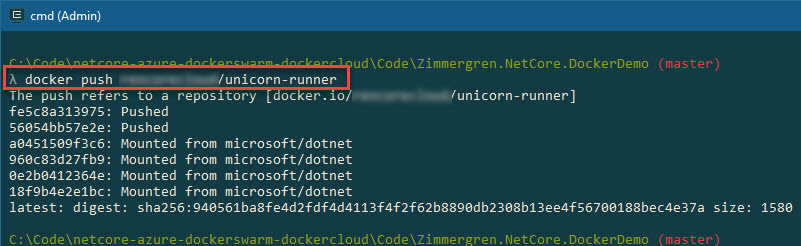
You’ve already signed in with Docker now, and we’re authenticated to the repository using docker login previously. We can simply push the image from our machine to the docker repo like this:
docker push yourrepository/myimage
You should see something like this:
C:\Code\netcore-azure-dockerswarm-dockercloud\Code\Zimmergren.NetCore.DockerDemo (master)
λ docker push yourrepository/unicorn-runner
The push refers to a repository [docker.io/yourrepository/unicorn-runner]
fe5c8a313975: Pushed
56054bb57e2e: Pushed
a0451509f3c6: Mounted from microsoft/dotnet
960c83d27fb9: Mounted from microsoft/dotnet
0e2b0412364e: Mounted from microsoft/dotnet
18f9b4e2e1bc: Mounted from microsoft/dotnet
latest: digest: sha256:940561ba8fe4d2fdf4d4113f4f2f62b8890db2308b13ee4f56700188bec4e37a size: 1580
- Verify the images in the Docker Cloud repository
Navigate to your docker cloud account and check out the repositories tab; It should be there:
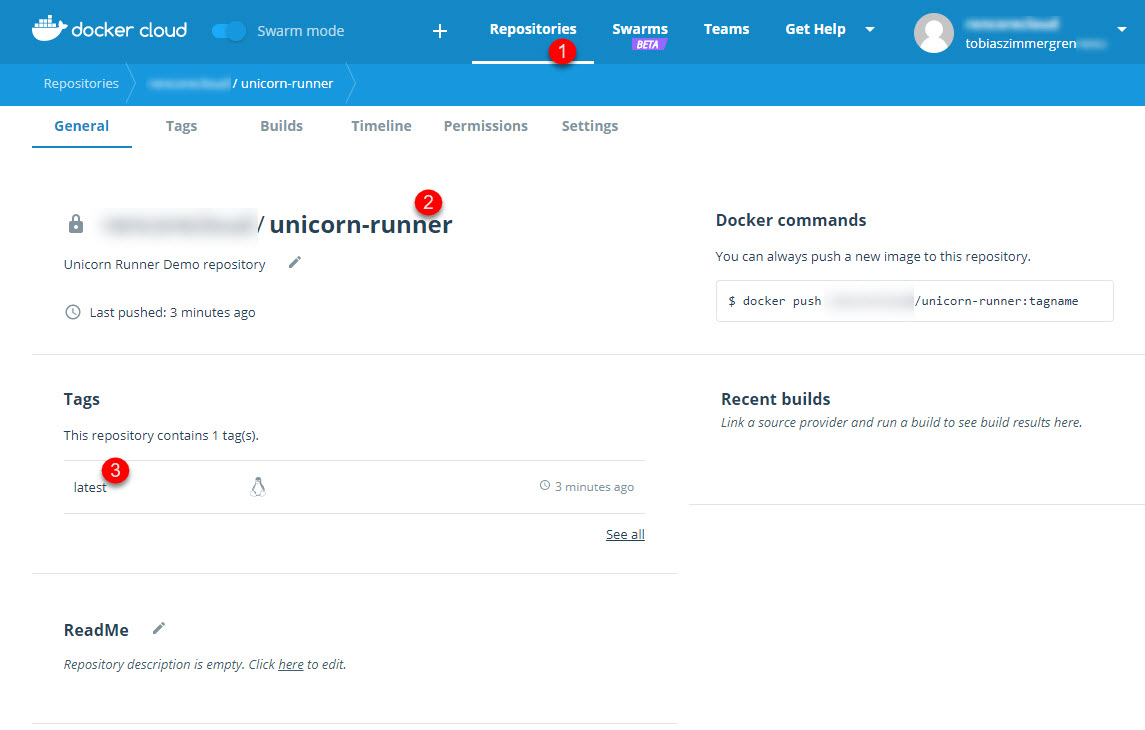
- Go to repositories
- Select your repository
- Ensure there is a push recently, and that it has the tag specified (we didn’t specify one in this case, so it default to
latest)
5 - Create and Deploy a Docker Swarm to Azure from Docker Cloud
Here comes the fun part. We’ve got our application, we’ve got our image in a container, we’ve built the image and pushed it to the docker image repository.
The next few steps will guide you through the creation of a new Docker Swarm, hosted in Azure and deployed from the Docker Cloud. It’s awesome, so tag along.
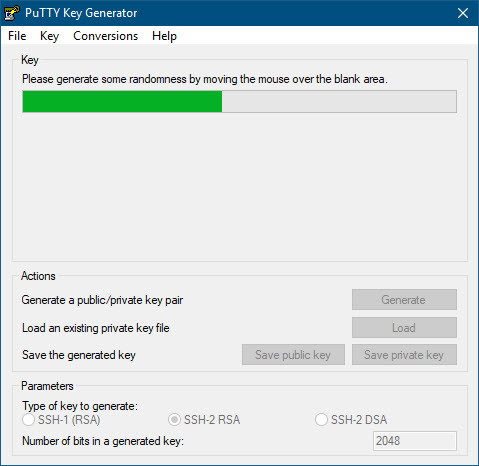
5.1 Generate SSH key
I’m currently doing this on Windows, and as such I’m using the awesome PuTTyGen.exe tool, available here https://www.chiark.greenend.org.uk/~sgtatham/putty/latest.html.
Generate a new SSH key using this tool, or any tool of your choice. Make sure you make a note of (copy/save) the SSH key to a secure location that you can access in the next step.
5.2 Create a new Swarm in Docker Cloud
- Navigate to https://cloud.docker.com
- Select
Swarmsin the menu - Click
Create
This will bring you to the Swarm creation page. From here we’ll be entering any necessary information to quickly set up the Swarm, then the Docker Cloud connection to Azure will handle the rest for us. Convenient, for sure.

The points in the picture:
- Name of your new Swarm (Name in Docker Cloud)
- Select Azure, which you’ve connected previously
- Give the Azure application a name (Name in Azure)
- Choose the Subscription you want to use (which should be conncted already)
- Create or use an existing Resource Group in Azure
- Set the location to your preferred location (I’m deploying mine in
West Europe) - Amount of managers: An odd number, and I wouldn’t recommend less than 3.
- Amount of workers (nodes/VM’s in the Swarm): You can change this later too, scaling up or down. I’m setting it to 5 for demonstration purposes, which gives me 5 servers connected as workers in the Swarm.
- Input the SSH key you generated previously
- Choose the size of the VM a Manager will have
- Choose the size of the VM a Worker will have
- Click Create!
For more information on the VM sizes available for the various nodes, check out https://azure.microsoft.com/en-us/pricing/details/virtual-machines/linux-previous/
5.3 Rockets! (Deploy)
Once the details have been entered as per the previous steps, the swarm will be created.
That’s it for setting it up, easy peasy. Docker Cloud handles all the configuration and infrastructure with Azure, and in a few minutes we can head over to Azure just to verify that all of the required resources have been set up and that we have our 5 worker nodes as requested.
5.4 Verify deployed resources in Azure
When the Swarm has been provisioned and is ready, you should see the resources in your Azure Portal from https://portal.azure.com.
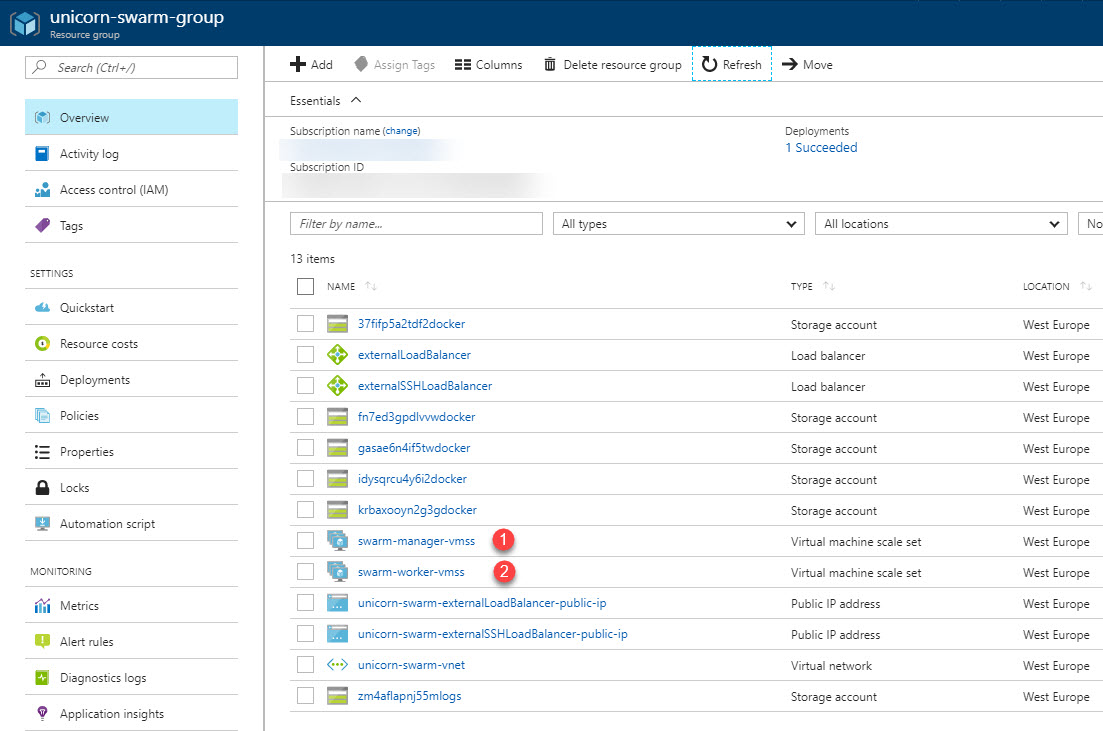
- Manager node VM scale set
- Worker node VM scale set
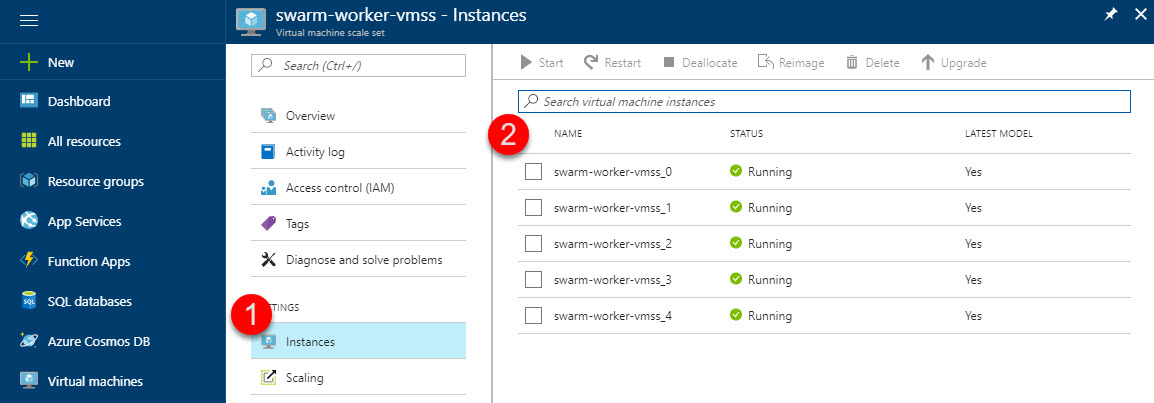
To verify that we actually got 5 worker nodes, we can do it from Azure (I’ll show you how to check these things with the cmdline soon).
- Navigate to the
swarm-worker-vmssitem - Click
Instances - Ensure you’ve got your 5 VM’s running (these are the nodes in your Swarm)
6 - Create a Service in our Docker Swarm to run our containerized application in the Azure cloud
I know I said that one of the previous sections was the fun part. But really, it just gets more fun. Tag along to see how we create a new Docker Swarm Service, and point to our application that we’ve pushed to the private docker repository.
I’m using Docker for Windows here, but the steps would be similar for MacOS.
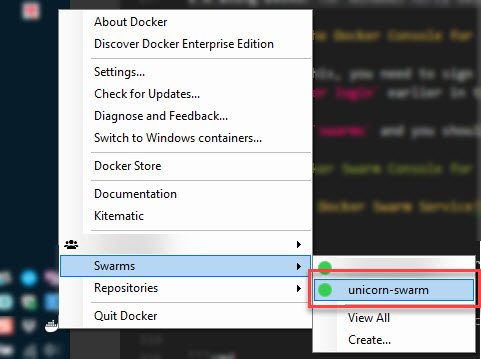
6.1 Launch the Docker Console for your Swarm
In order to do this, you need to sign in to the Docker for Windows tools using the same account, or any account with access to the repository you have created in Docker Cloud. I’m using the same account as when I did docker login earlier in this post.
Now, hover over swarms and you should see your swarm pop up there, and if things are awesome, it should be green. If it’s grey or yellow, it might still be provisioning and you should wait a few minutes.
It will bring up the command window for the Docker Cloud bridge to your Swarm which is hosted in Azure, making it super-convenient to manage.
6.2 Create a Docker Swarm Service
In the command window, enter the following to create a new Service, which will be replicated 1 time (1 container running), and only be deployed to any machine where the role is worker (we don’t want to deploy to the manager nodes), and use the registry auth so we can access our image in the repository:
docker service create --name my-unicorn-runners --limit-memory 50mb --constraint "node.role == worker" --replicas 1 --with-registry-auth yourrepository/unicorn-runner
The service should be created, and you should be able to see it using this command:
docker service ls

6.3 Verify that the sample app is working
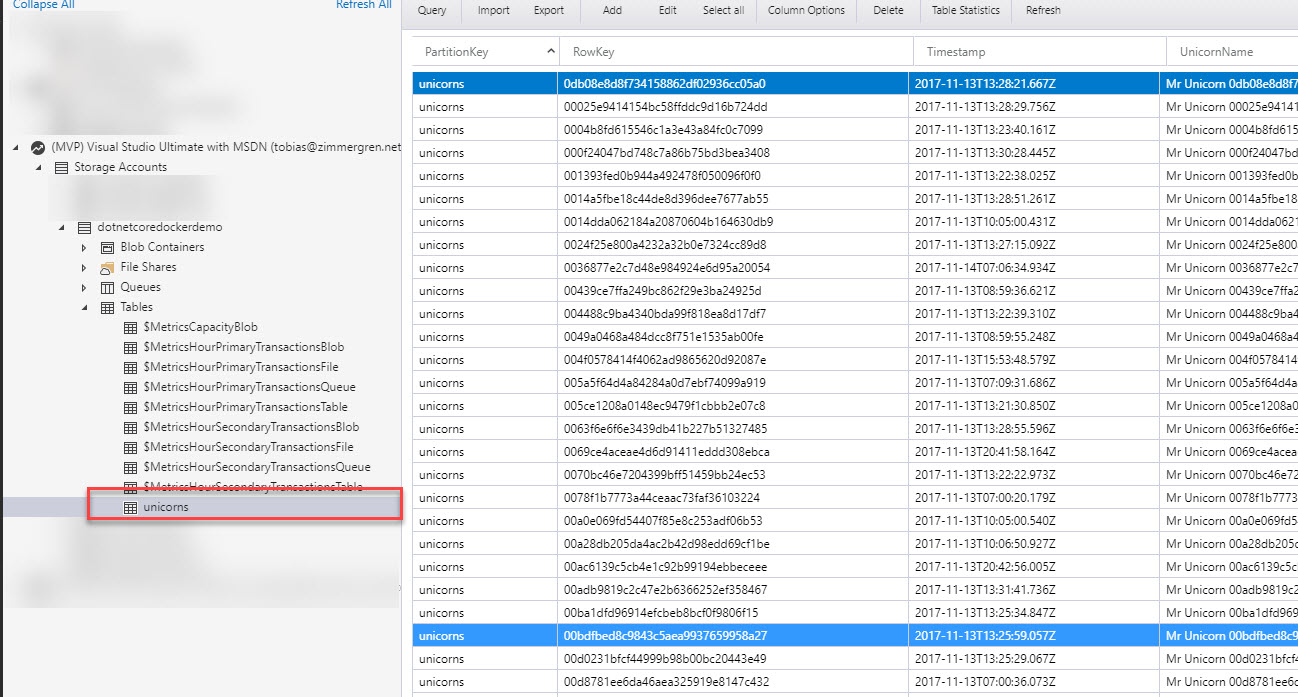
So, in the application code, I have hardcoded (another post on handling secrets and securing your connection strings) the connection string data, and it should automatically be writing messages to the storage table. In a real-world application, we would invest a lot more time into securing the connectivity details and use proper secrets and vaults (KeyVault is a good option, for example).
In order to check that the current workers are actually performing, we can easily check the Azure Storage Table to see that there’s a new row being entered every 500ms:
6.4 Scaling up the Docker Swarm Service
If you want to scale this up to a more distributed environment, we already have 5 nodes available for work. Each node can handle quite a lot of these small applications since they’re very limited in operations (atomic execution, it has a simple job to perform, etc). We’ve also limited the Memory that a container can maximally use, so we could push quite some containers into the service by now.
I’m going to keep it simple in the theme of the rest of this post, and just scale this up to 500 containers. Yep, that’s right - five hundred instances of our application, each one will be writing a message to the storage table every 500ms, which is twice per second. So 500x2x60 is about 60 000 messages per minute. Imagine what that’d be if we would remove any Thread.Sleep() that we put there for the demo.
So, to scale a service up, we need to know the ID of the given service. In order to get that, run the docker service ls command as per previous examples in this post, and then use the first few characters of that ID to scale, as such:
docker service scale xyz=500
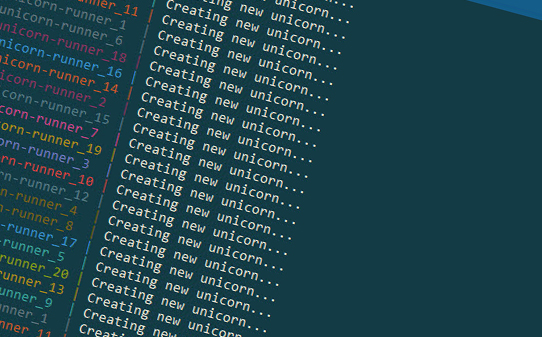
At this point, the service is scaling up your application to 500 containers (instances) of the unicorn-runner app. It happens in a matter of seconds and viola, we can see the results by checking docker service ls again, but also by checking the Azure Storage Table to see if anything is happening in the unicorn table:

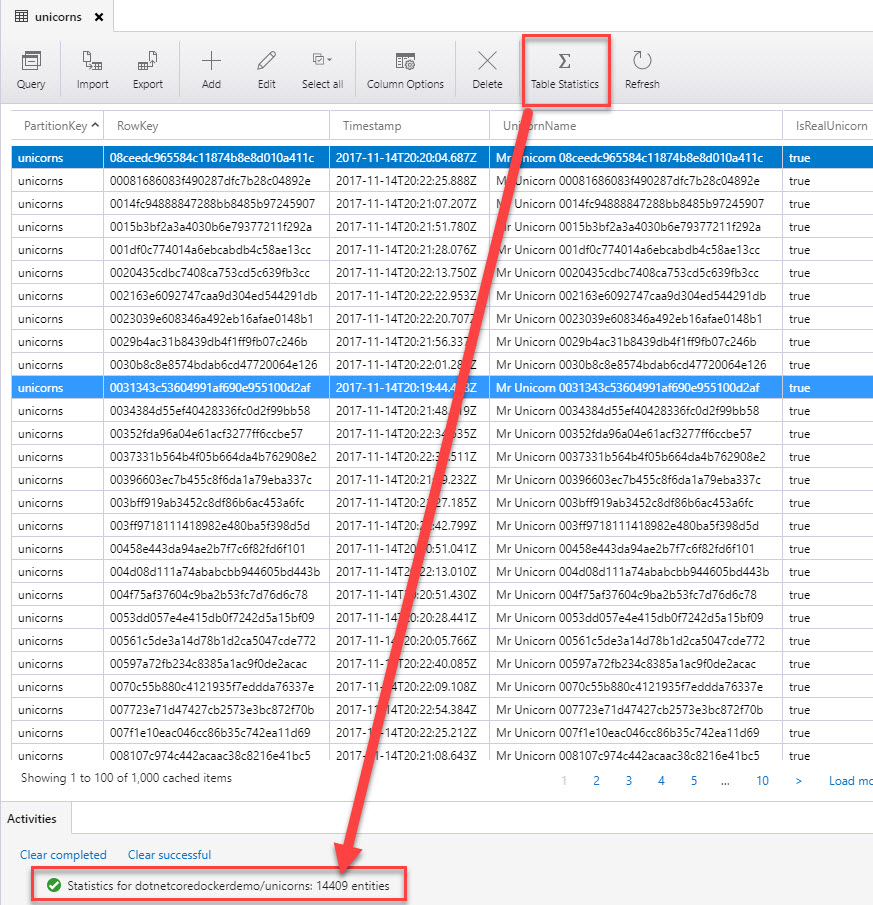
We can see that after only a handful of seconds, the table is already getting slammed with a LOT of new messages - it’s working.
7 - Scaling your nodes in Azure
So we can now scale up to 500 containers, or actually a lot more. But what happens when you scale to the brink of the system you’ve currently got configured and are using? Well, then horizontal scaling comes in handy where you just scale out your nodes (VM’s in Azure). This means we’ll add more nodes or servers to the Swarm. In Azure we can also increase/change the size of a Swarm to give each server more juice.
While this can be done through the Azure API’s too, the easiest way to get started to add more servers to your Swarm is to do it from the Azure Portal.
7.1 Select the workers, and scale out horizontally
In the Azure Portal, find your swarm-worker-vmss resource and then select Scaling.
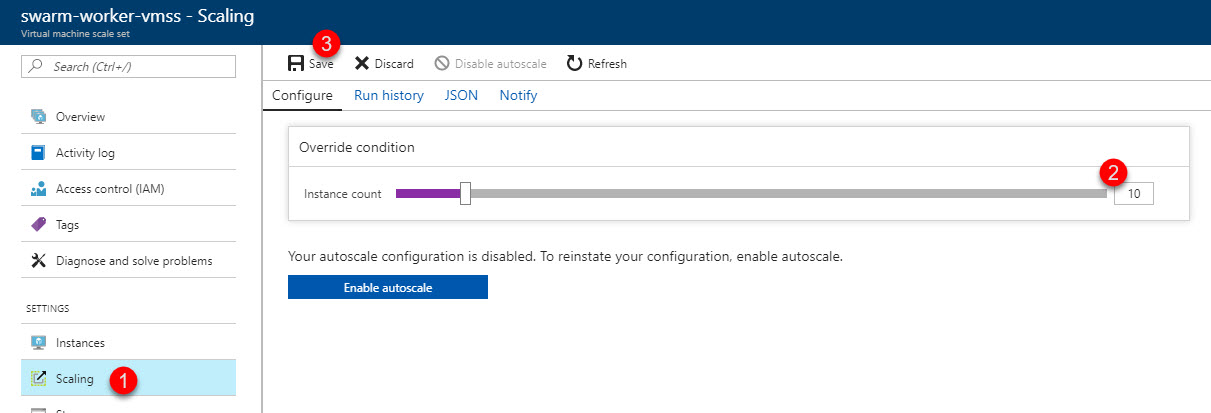
It will likely take a few moments, then we’re ready to go!
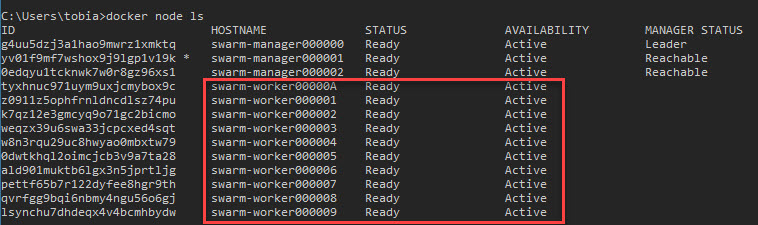
7.2 Verify in the console
It can take a few moments for the nodes to become available, so give it a few minutes and then you should be able to see them if you run this command to list all nodes. I chose to scale up to 10 workers, so that’s what I would want to see:
docker node ls
So we’ve scaled out the nodes, but the docker service is still running as it was previously; It doesn’t get automatically rebalanced (because it would mean killing a running container if it had to move to a different server just like that).
We can re-scale again, and then the service will spread the containers out evenly throughout the available nodes:
docker service scale zq=2000
How about that. We just boosted the swarm up to 2000 containers running simultaneously.
You could verify in Azure tables again to ensure things are working as they should; And you could of course also verify with the docker service ls commands that the containers gets scaled out. There’s plenty of more devops and monitoring things around these operations, but let’s cover that in another post.
Alrighty, that’s a wrap for now.
Summary
So there you have it. We’ve covered quite a lot of ground in this post.
I hope you’ve enjoyed it and can benefit from this guide.
Please feel free to drop me a friendly comment in the comment section below, and I’d be happy to have a dialogue.
Cheers,
Tobias Zimmergren.
Comments are closed