
In my previous article (SharePoint BDC Part 1: Getting started with the Business Data Catalog) I talked about what you’ll need to do in order to begin to work with the BCD in SharePoint (MOSS 2007 specifically, as it’s an Enterprise feature).
In this article I will briefly guide you through the process of creating your first BDC Web Part that will communicate with the BDC.
Note: You can download the source code for this sample project here. (Sorry, download no longer exist).
Prerequisites
You need to have your BDC set up and ready to use before you can start creating your own BDC Web Parts to communicate with the BDC. (See my previous article for a walkthrough)
We will also use Microsoft Visual Studio (2005/2008) to create the Web Part.
Enjoy!
What we had -> where we’re going
In the previous article I talked about using the built-in Web Parts for your BDC needs. Although they fill a lot of requirements, sometimes you just might want to write your custom Web parts instead.
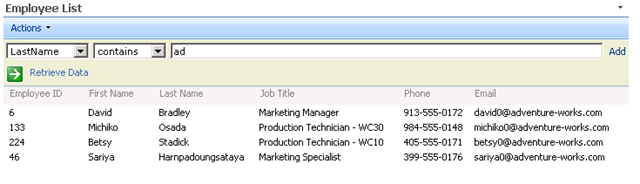
This is what the standard BDC list looks like:
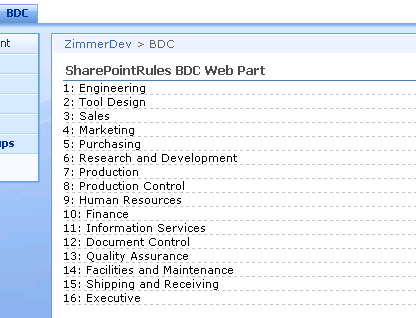
This is what the final result will look like: (Note, this is a custom Web Part which you’ll develop in the following steps)
Step 1 – Create a new Web Part project
I will expect that you already know how to create a new Web Part project (either using the VSeWSS or using WSPBuilder, or any other tool of preference).
See this article for a WSPBuilder complete walkthrough: WSPBuilder – Walkthrough of the Visual Studio Add-in
Step 2 – Add the BDC references to your project
Once you’ve got a Web Part project up and running, you should add some references that are needed for the BDC Object Model.
You should add the “Microsoft® Office SharePoint® Server component” reference to your project:
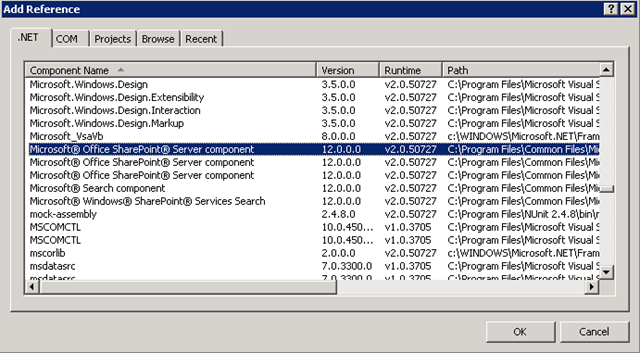
Once you’ve added this reference to your project, you have a GO for using the BDC namespaces.
Add the following using-statements to the top of your Web Part:
using Microsoft.Office.Server.ApplicationRegistry.MetadataModel;
using Microsoft.Office.Server.ApplicationRegistry.SystemSpecific.Db;
using Microsoft.Office.Server.ApplicationRegistry.Runtime;
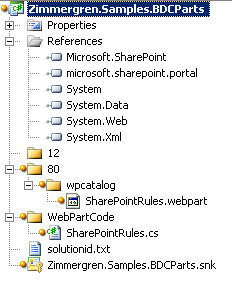
This is what my Visual Studio project looks like when using the WSPBuilder to create my Web Parts (notice the reference to microsoft.sharepoint.portal which comes from the reference we added):
Now we’re good to go! Let’s start coding then!
Step 3 – Utilize the BDC object model to access data
Note, you can download the complete Visual Studio Project at the end of this article with the source code.
// Fetches all the LOB instances from the metadata repo:
var myInstances = ApplicationRegistry.GetLobSystemInstances();

// Fetch the HR instance for Human Resources:
var humanRecourcesInstance = myInstances["HR"];

// Pick out the Department entity from the HR instance:
var departmentEntity = humanRecourcesInstance.GetEntities()["Department"];

// Fetches the method GetDepartments which is specified in our ADF file (Application Definition File) for our BDC connection:
var getDepartmentMethod = departmentEntity.GetMethods()["GetDepartments"];

// Fetches the MethodInstance DepartmentFinderInstance:
var deptFinderInstance =getDepartmentMethod.GetMethodInstances()["DepartmentFinderInstance"];

// We call the departmentEntity.Execute() method to fetch DbEntityInstance’s:
var foundEntities =(DbEntityInstanceEnumerator)departmentEntity.Execute(deptFinderInstance,humanRecourcesInstance);
We loop the DbInstances and then output their names to literal controls.
In a real scenario, we would most likely add those instances to an SPGridView instead of printing Literals to enable Views, Sorting, Paging and a whole set of awesome features that comes with the Grid View.:
while (foundEntities.MoveNext())
{
    var currentDepartment = (DbEntityInstance)foundEntities.Current;
    Controls.Add(new Literal{Text =
              "    "});

    Controls.Add(new Literal {Text =                   currentDepartment.GetFormatted("Name")+ "
    "});

    Controls.Add(new Literal { Text=
    currentDepartment.GetFormatted("DepartmentID").ToString() });

    Controls.Add(new Literal{ Text = "    " });
}
When you’ve written the aforementioned code, you will have the base set up for retreiving data from your BDC connection. You will (of course) have to dig a whole lot deeper if you want to master the arts of BDC and the object model that comes with that. But at least it’s a start for you to get to know the namespace, and learn what namespaces to use – and see that it actually works!
Step 4 – Finalize and deploy your Web Part
Once you’ve created the project, build it and deploy to your SharePoint development machine and add your Web part to see the action:
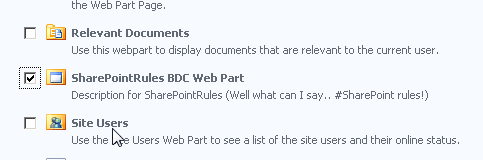
(Yes, the Web Part is called SharePointRules BDC Web Part – and for a good reason too!)
Step 5 – May your creation shine upon SharePoint! (aka. Final result)
This is what the creation looks like (wow..), which basically only utilize the most basic aspects of the BDC Object Model to get started – but here you have it in action, fetching data immediately from your back-end SQL server (Adventure Works database in this case) using the BDC:

Summary
That’s a wrap for this article. I have walked you through the few simple steps needed to create your own first BDC Web Part.
In my next BDC article I will talk about what alternative tools I find suitable to use for generating your ADF (Application Definition File).
Comments are closed