When working with Azure DevOps, or locally sometimes with Visual Studio, you may get the following error if there’s a mismatch. It can depend on what versions of the SDK you’ve got on your machines, either local or build agent.
Unable to locate the .NET Core SDK. Check that it is installed and that the version specified in global.json (if any) matches the installed version.
A related error message that I also see regularly together with the one above is:
error MSB4236: The SDK 'Microsoft.NET.Sdk.Web' specified could not be found.
This error can happen when the defined version of the .NET Core SDK differs from the configured value when running the dotnet tools. (e.g., the SDK version).
Realizing others may run into the same, here are some quick ways that I made it work - if it can help anyone, that’s great.
Option: Define the correct .NET Core SDK in Azure DevOps
If you’re using Azure DevOps, you can easily define the version of the .NET SDK that should be targeted when running the dotnet commands.
You already should know the version you want to target. In my example, it’s 2.2.402. Knowing this means you can ensure that your build pipeline points to the correct versions too.
Use the correct .NET Core SDK version using a Task in the UI.
If you use the visual designer for building your Azure DevOps pipelines, you can define the .NET Core SDK version to use super-easy.
Add a new build task named Use .NET Core:
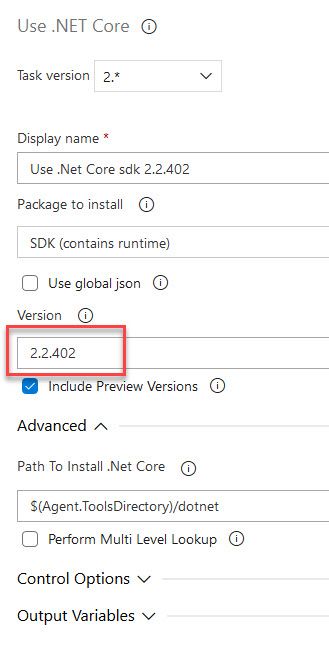
Azure DevOps build Task that defines the .NET Core version to target.
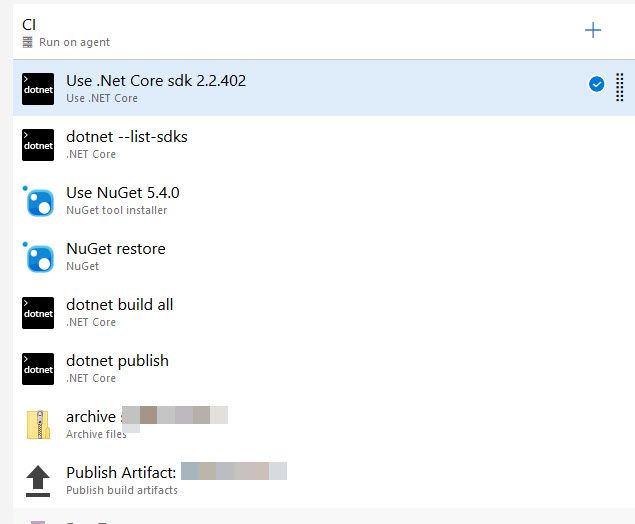
In a simple pipeline, it can look like this. Ensure that the task you add is at the beginning, so all subsequent dotnet tasks use the version you’ve defined:

Use .NET Core build task in Azure DevOps
As a verification, I also added a custom .NET Core task dotnet --list-sdks which will output in the console log what version is being targeted. Sure enough, it ensures that the configuration was a success.
Use the correct .NET Core SDK version using YAML
If you’re using YAML pipelines instead of the visual pipelines, the task(s) look like this.
Specify the .NET Core version to target in the pipeline:
steps:
- task: UseDotNet@2
  displayName: 'Use .Net Core sdk 2.2.402'
  inputs:
    version: 2.2.402
    includePreviewVersions: true
Verify that the pipeline indeed is using the correct version when it runs:
steps:
- task: DotNetCoreCLI@2
  displayName: 'dotnet --list-sdks '
  inputs:
    command: custom
    custom: '--list-sdks '
I resolved all the issues without any code changes, which is what I ideally want - no changes to code due to tooling or SDK issues.
Option: adjust global.json
Unless it’s about upgrading to the latest security patch or version, I wouldn’t consider changing the version in the codebase unless there is a logical reason. I’d instead do it in the pipelines and ensure the tools know how to work with the code.
If you want to go down the other route and modify the global.json, you can, of course, do that to match whatever version the build agents and developers have installed.
A global.json file can look like this:
{
  "sdk": {
    "version": "2.2.402"
  }
}
More reading
- global.json overview (Microsoft Docs)
- Using the .NET Core Task (Microsoft Docs)
Comments are closed