Create a custom Azure Security Center recommendation with Azure Policy
In Azure Security Center you get a lot of built-in recommendations based on various compliance- and security controls. These are based on industry standards and include things like Azure CIS, PCI DSS, SOC TSP, ISO 27001, and more.
However, many organizations have different requirements than the defaults, and sometimes want to introduce additional or modified checks.
With Azure Security Center we get the capability to use custom recommendations together with Azure Policy, where we now can define our corporate policies and roll them out as recommendations in ASC. A great way to tailor the experience according to our use cases.
Create a custom recommendation for Secure Score
There are a couple of things we need to do to get a custom recommendation rolling through Azure Security Center. Here's what we'll do next:
- Create an Azure Policy Definition
- Create an Azure Policy Initiative
- Create a custom recommendation in ASC (Azure Security Center)
- Review the custom recommendations
Create an Azure Policy and an Azure Policy Initiative
Azure Security Center allows you to select an Azure Policy Initiative when creating custom recommendations.
In my production workloads I may have a plentitude of policies already, but for the purposes of this blog post and demonstrating the steps, let's start from the beginning.
Create an Azure Policy
First, we need to create a new Azure Policy. Here's one of the simples ones as an example.
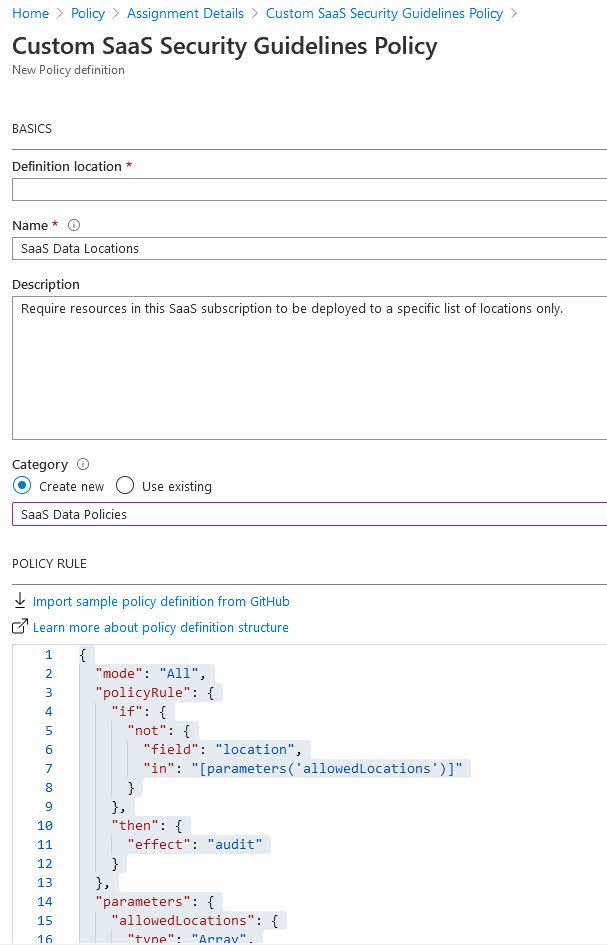
The full json template looks like this in all its simplicity:
{
  "mode": "All",
  "policyRule": {
    "if": {
      "not": {
        "field": "location",
        "in": "[parameters('allowedLocations')]"
      }
    },
    "then": {
      "effect": "audit"
    }
  },
  "parameters": {
    "allowedLocations": {
      "type": "Array",
      "metadata": {
        "displayName": "Allowed locations",
        "description": "The list of allowed locations for resources.",
        "strongType": "location"
      }
    }
  }
}
In this policy I want to ensure that any deployments of resources happen in any of the allowed data center regions only. Due to legal constraints, and additional cost for cross-datacenter transactions, we want to ensure that all resources comply with these guidelines.
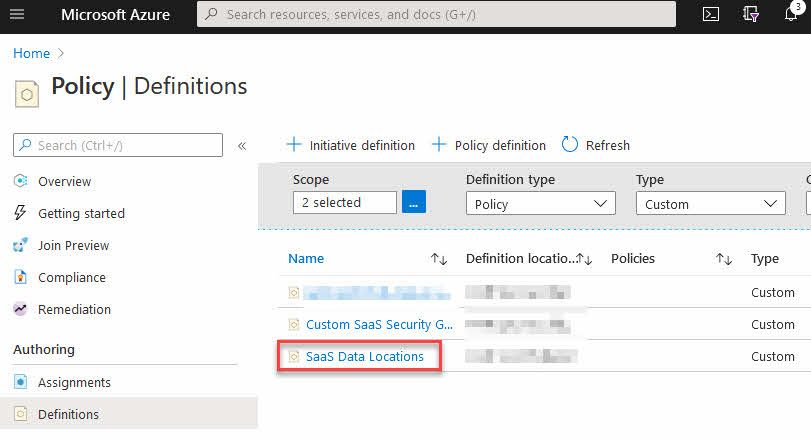
I can verify that the policy exist by looking into the "Policy" - "Definitions" section, and filter on "Custom" policies:
Create a Policy Initiative
Next, we want to create a new Policy Initiative, and assign at least one policy to that initiative. You can assign more, of course, which enables you to create further custom recommendations and assign all of them to Security Center using the initiative.
Go to "Policy" - "Definitions" and click "Initiative definition". From there, you can define the metadata around the initiative, and also select what Policy definitions you want to include. I will select "Custom" and then my custom policy definition names "SaaS Data Locations" that I created earlier:
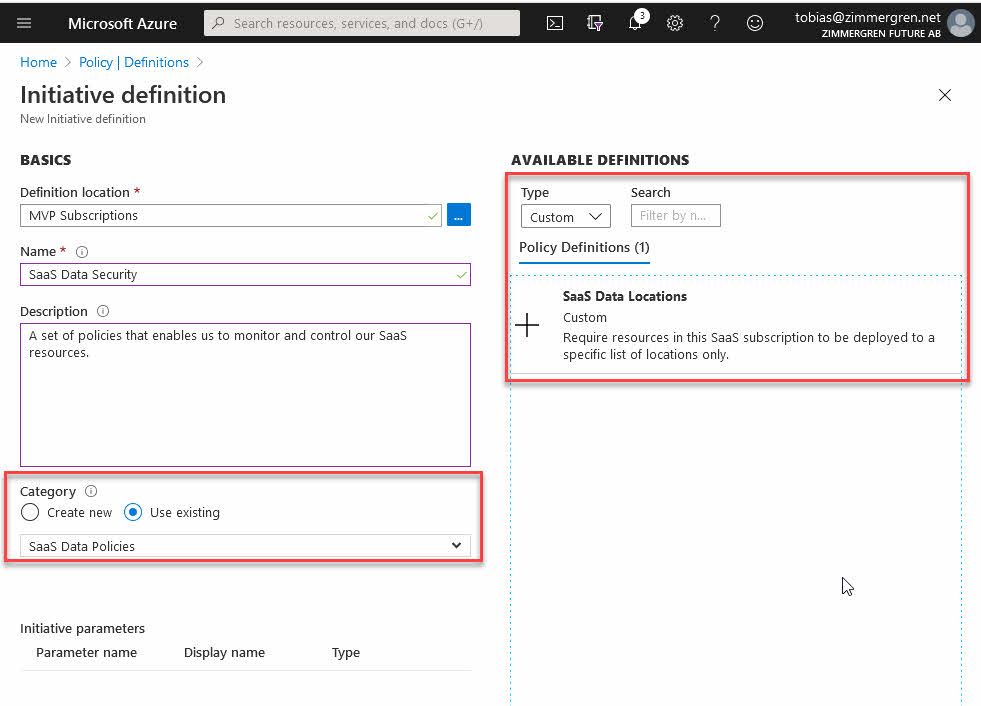
When I have selected the custom policy, I can start populating the parameters, which in my case will dictate what resource locations I will allow across all my resources:
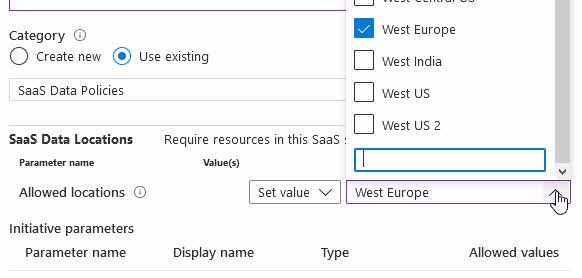
At this point we have our custom policy, or a set of policies, and have assigned them to one or more initiatives. Moving forward, we can connect these as custom recommendations in Azure Security Center - let's take a look at that next.
Create custom recommendations in Azure Security Center
In Azure Security Center we can connect the Azure Policy Initiative, which will now become custom recommendations in our Azure Security Center.
Go to "Azure Security Center" - "Regulatory Compliance" - "Manage compliance policies". From here, select a scope where you want to apply your policy. I am targeting a specific subscription for this initiative, where my SaaS solutions reside, specifically.
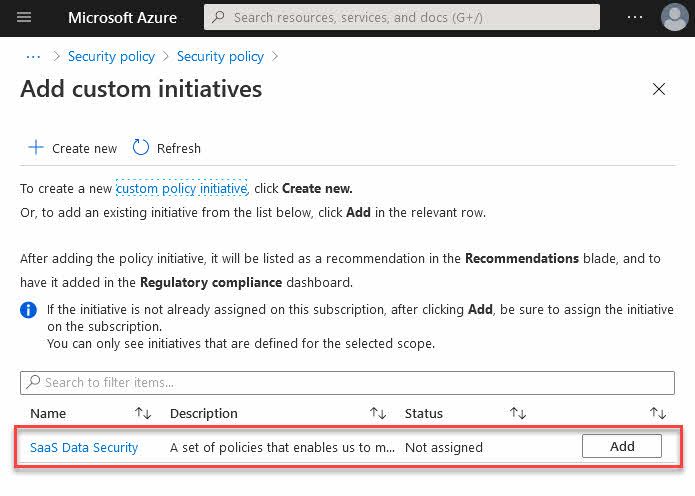
When you have selected your scope, you can find some out of the box standards, and you are also presented with a way to "Add a custom initiative", which as of this writing exist at the bottom of the page:
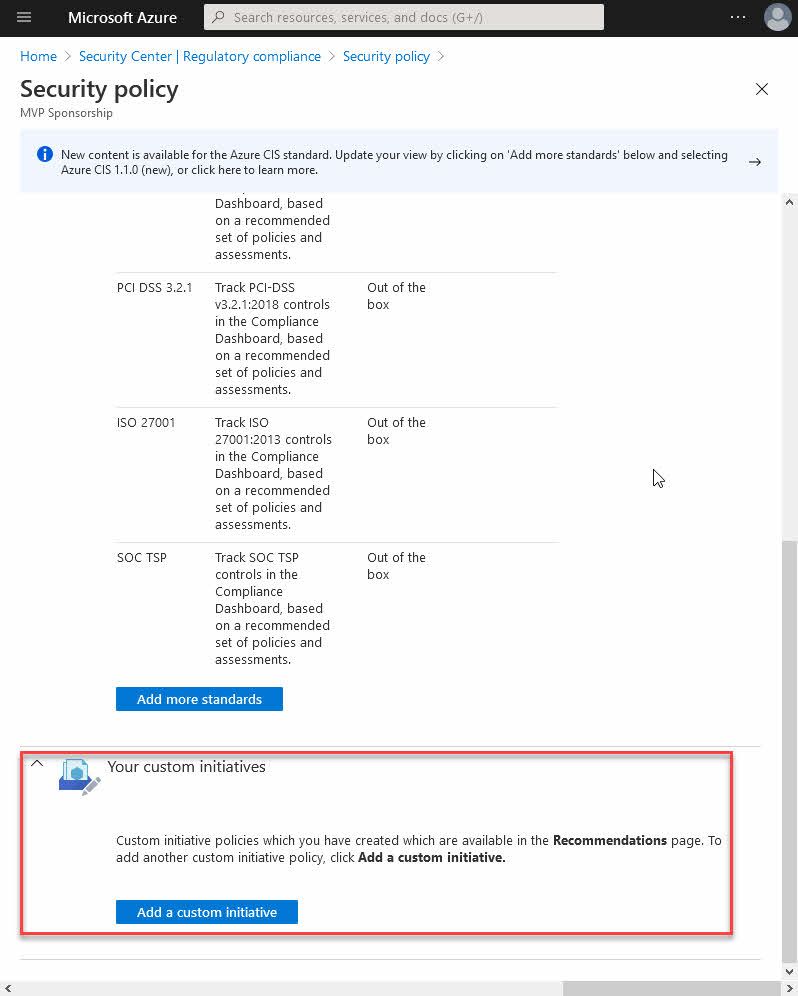
From here, you can see your custom initiatives and select them from the list.
NOTE: You can only see initiatives that are on the same scope as the initiative. If you have selected a different scope here, the initiative will not be displayed.
If your list is empty, make sure your Policy Initiative is assigned to the selected scope first.
I can see my one initiative that is assigned at this specific scope, so I can now click "Add":
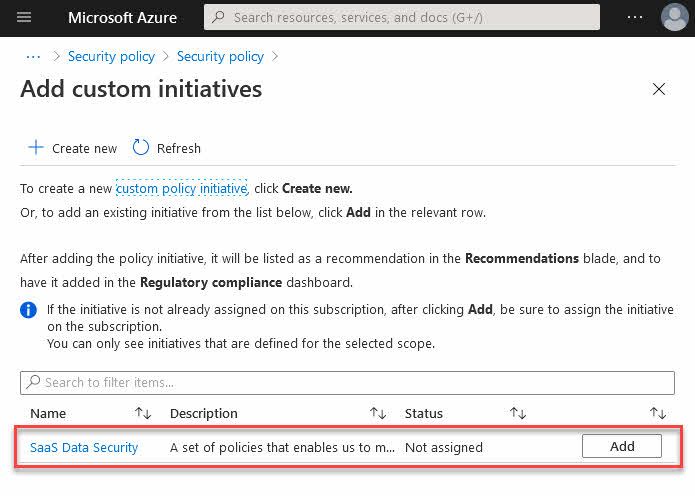
Iterate through the parameters, if any, and any other configuration you want to do, then click "Create".
Going back to the Security Policy page where we created the custom policy in Azure Security Center, we can now see the new custom recommendation listed:
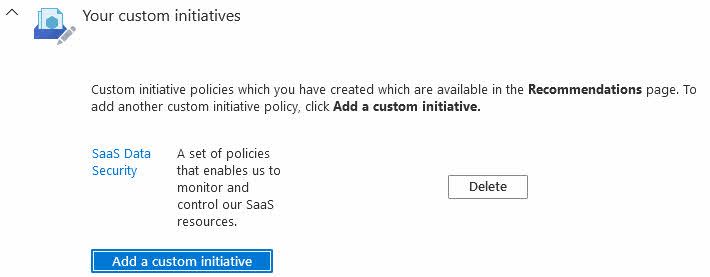
I am not entirely sure how long time it will take for the recommendations to appear in Azure Security Center. I have seen various times to propagate the recommendations across subscriptions - the notification dialog indicates that it can take about 10 minutes, meanwhile Microsoft Docs mention up to an hour.
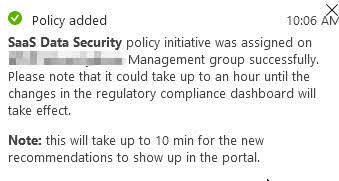
I usually add my custom initiatives and then focus on other tasks for an hour, then come back to verify that they work.
Review the custom recommendations in effect
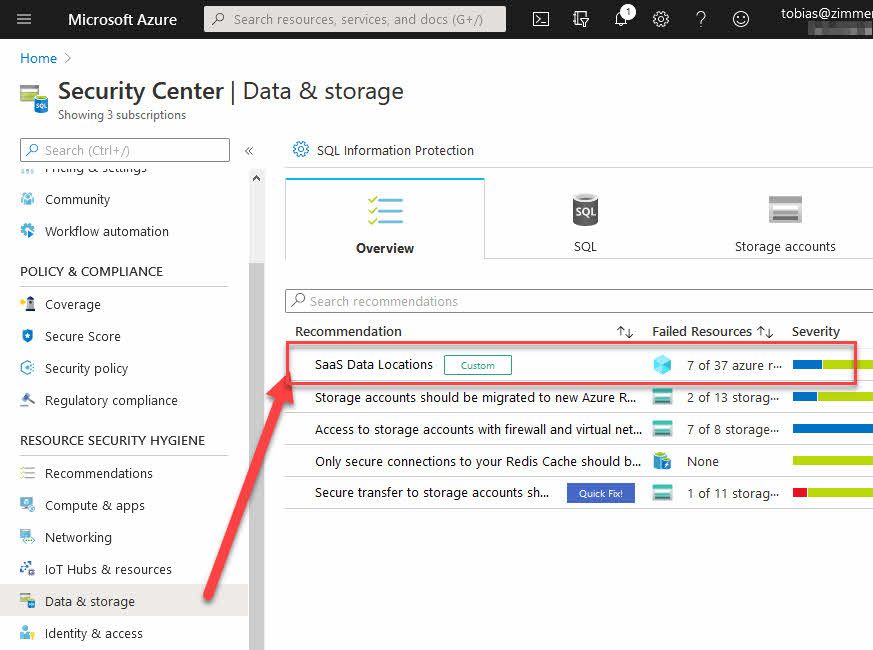
When the policy initiative is in effect as a custom recommendation, we should see it in Azure Security Center under "Data & Storage". Note that the recommendation is also flagged as Custom, indicating that it's something we've designed ourselves, or deployed from a third party solution.
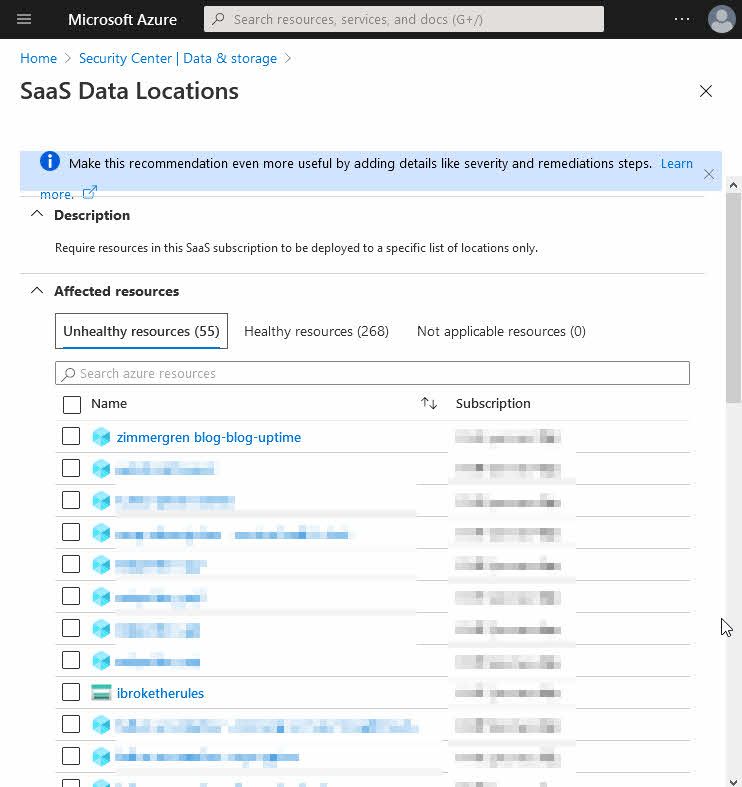
Clicking on the recommendation brings up a list of all the unhealthy resources. In my case, all resources that are NOT in West Europe.
Summary
In this post we walked through how to create a custom Policy Initiative based on one or more Policy Definitions, and how to attach them to Azure Security Center. This setup helps us automatically bubble up violations of the policy to Azure Security Center, where the UI is intuitive to work with.
When working with agile teams where you may enable developers and other colleagues to spin up new resources in subscriptions, this comes in handy to keep an eye on things. Granted, this is a way to indicate the policy violations in Azure Security Center, but you can be more proactive by denying the creation of resources in the disallowed regions at the get-go, too.
Stay on top of your Azure Governance game!
Related reading about Azure Governance:
- Understanding Azure Policies with Visual Studio Code
- Using the Azure Resource Graph to improve your Azure Governance game
- Using Azure Application Change Analysis to discover configuration changes in Azure services
Thanks for reading!




Recent comments