ARM and Bicep templates and are often used to deploy a specific configuration of resources on infrastructure. However, you need to carefully craft the templates to fit our scenarios and situations. Creating templates can be time consuming.
In the Azure Portal, you’ve had the option to export a resource, or a set of resources, as an ARM template - then later, you could convert that to Bicep.
With Visual Studio Code, the Bicep extension can generate the Bicep templates from an existing Azure resource. The extension is a great capability, and it means you can quickly prototype and design our templates from within VS Code.
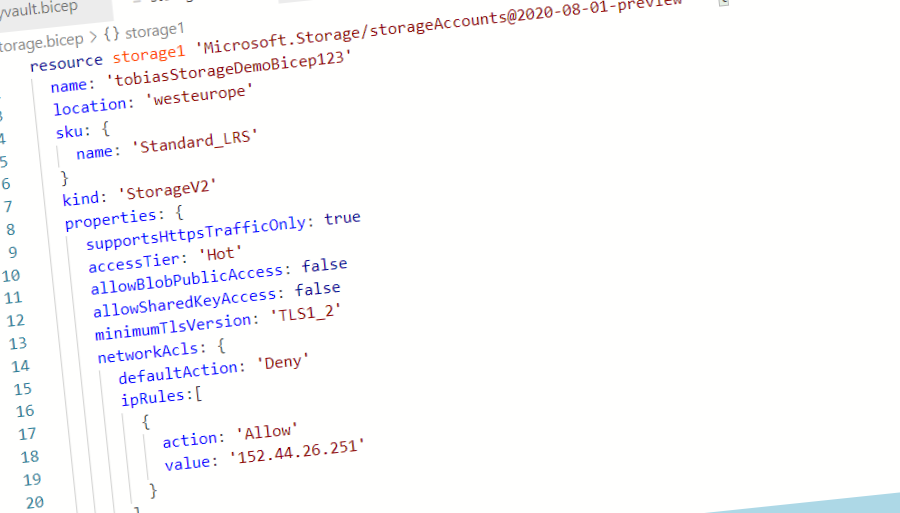
I’m using Visual Studio Code to generate Bicep templates for Azure infrastructure development.
Install the extensions
Here’s a list of some of the extensions I recommend, including the Bicep extension and the Azure Resource Manager (ARM) Template extensions. Feel free to explore more extensions.
You can also read more about my favorite VS Code extensions for Azure.
- Bicep: Brings you the Bicep language to your fingertips. Intellisense, validation, snippets, code navigation, refactoring, and more.
- Azure Resource Manager (ARM) Tools: Helps you with language support, resource snippets, resource auto-completion and more for ARM templates.
- Azure Tools: Provides a pack of multiple tools, including the Azure Resources extension, which is helpful for grabbing the correct resource IDs and more directly from within VS Code.
Update December 2022:
The Bicep and ARM extensions used to be part of the Azure Tools extension pack, but have since been removed. Therefore, this post is updated to reflect this.
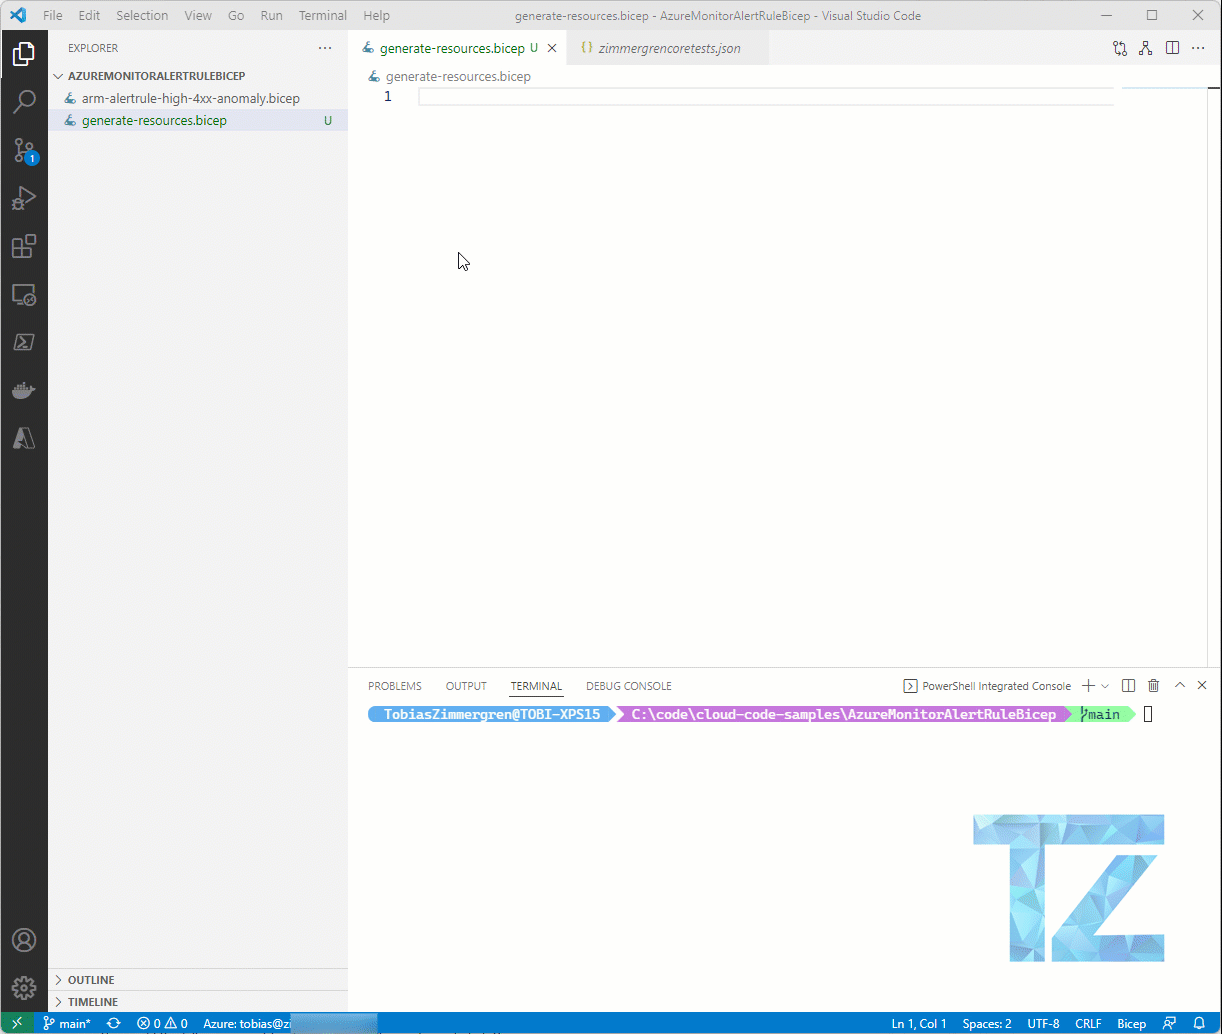
Generate Bicep templates
You can now bring up the command window and use the Bicep tools (on Windows, Win + P).
Command: Insert Resource
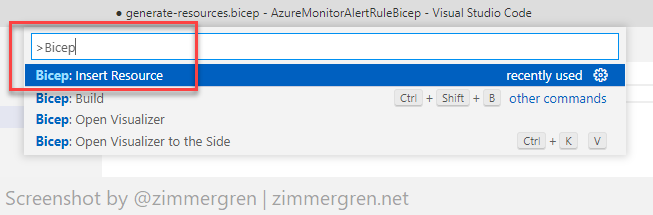
This command requires a resource ID. That is the fully qualified resource ID of any Azure Resource to which you have access.
If you do not know it by heart, that’s OK.
I’m listing four easy ways you can get the Resource ID for any Azure resources you have. You will have the option to select what fits your need - and the list of options below is not complete. There are many options for optimizing how you work.
Get a Resource ID
You need to enter a Resource ID of an Azure Resource to generate the Bicep files for it. I’m lining up a few easy options here.
Option: Get the Resource ID using Visual Studio Code
With the “Azure Resources” extension you can browse your resources directly from within Visual Studio Code.
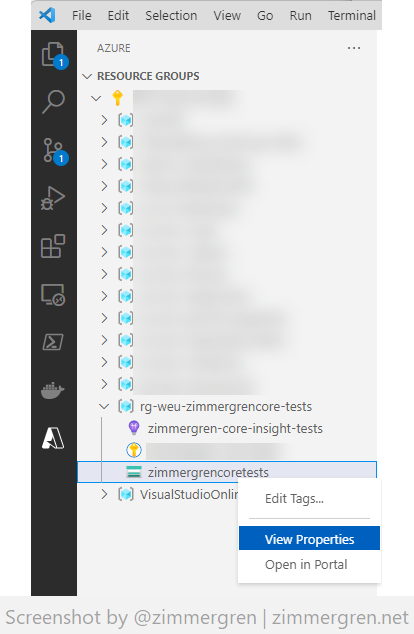
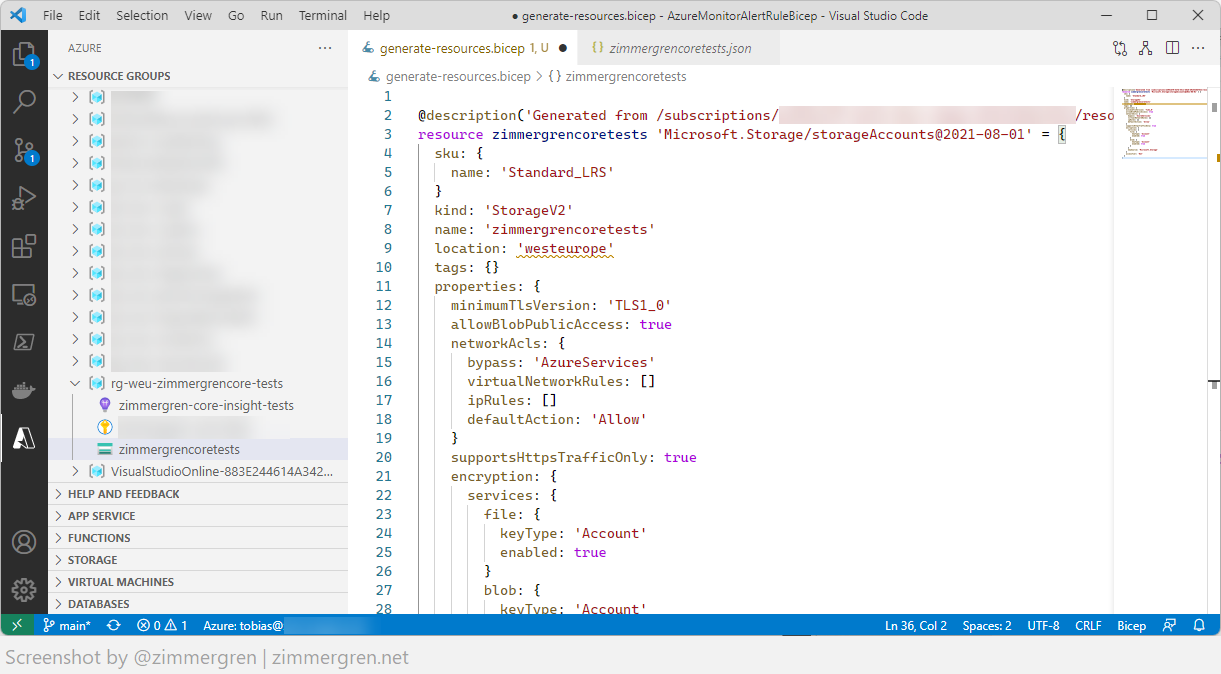
I’m using Visual Studio Code to view the Properties of an Azure Resource, where I can grab the Resource ID.
You will see the JSON representation of the resource, including the Resource ID. You can copy the ID from there and insert it into the Bicep command.
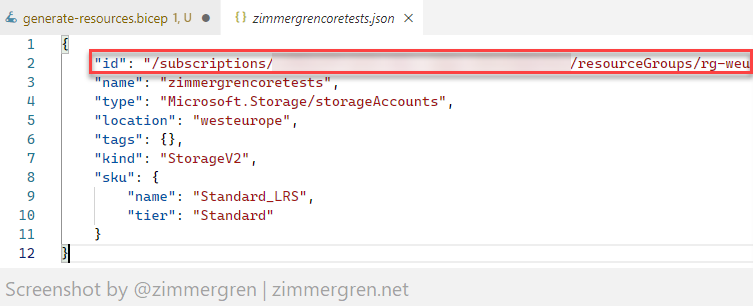
Copy the Azure Resource ID from the Visual Studio Code Azure extensions.
Option: Get a Resource ID with the Azure Resources web app
One option to get the IDs of your resources is to use the Azure Resource Explorer app. I wrote about this in 2016, and it still holds today.
Read more:
Option: Get the resource ID from the Azure Portal
Another option to get the Resource ID for your resources is the Azure Portal.
You can go to “Properties” and read the “Resource ID” value for any of your resources.
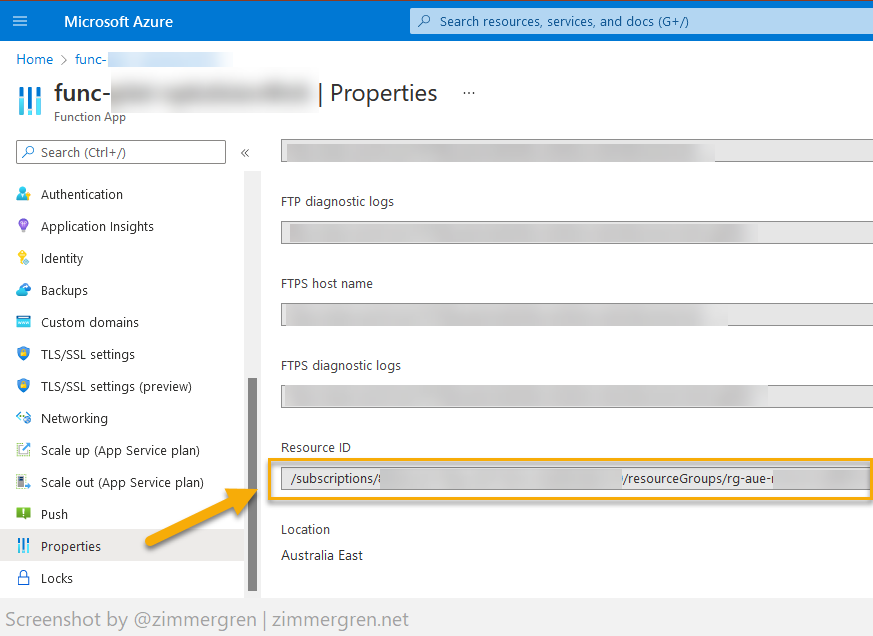
Get the Resource ID for an Azure Resource from the Azure Portal.
Option: Get a resource ID using the Azure CLI
There are many ways to get a resource ID from the Azure CLI. When I work with resources, I usually know what resource group I’m looking for, or that my resources belong to a specific resource group.
With this simple command you can list all resources, and their Resource IDs:
az resource list -g "resource group name" -o table --query "[].{Name:name,ResourceID: id}"
The query asks for all resources within the given resource group, outputs the results as a table, and only displays the Name and Resource ID. From there, you can copy the ID you need.
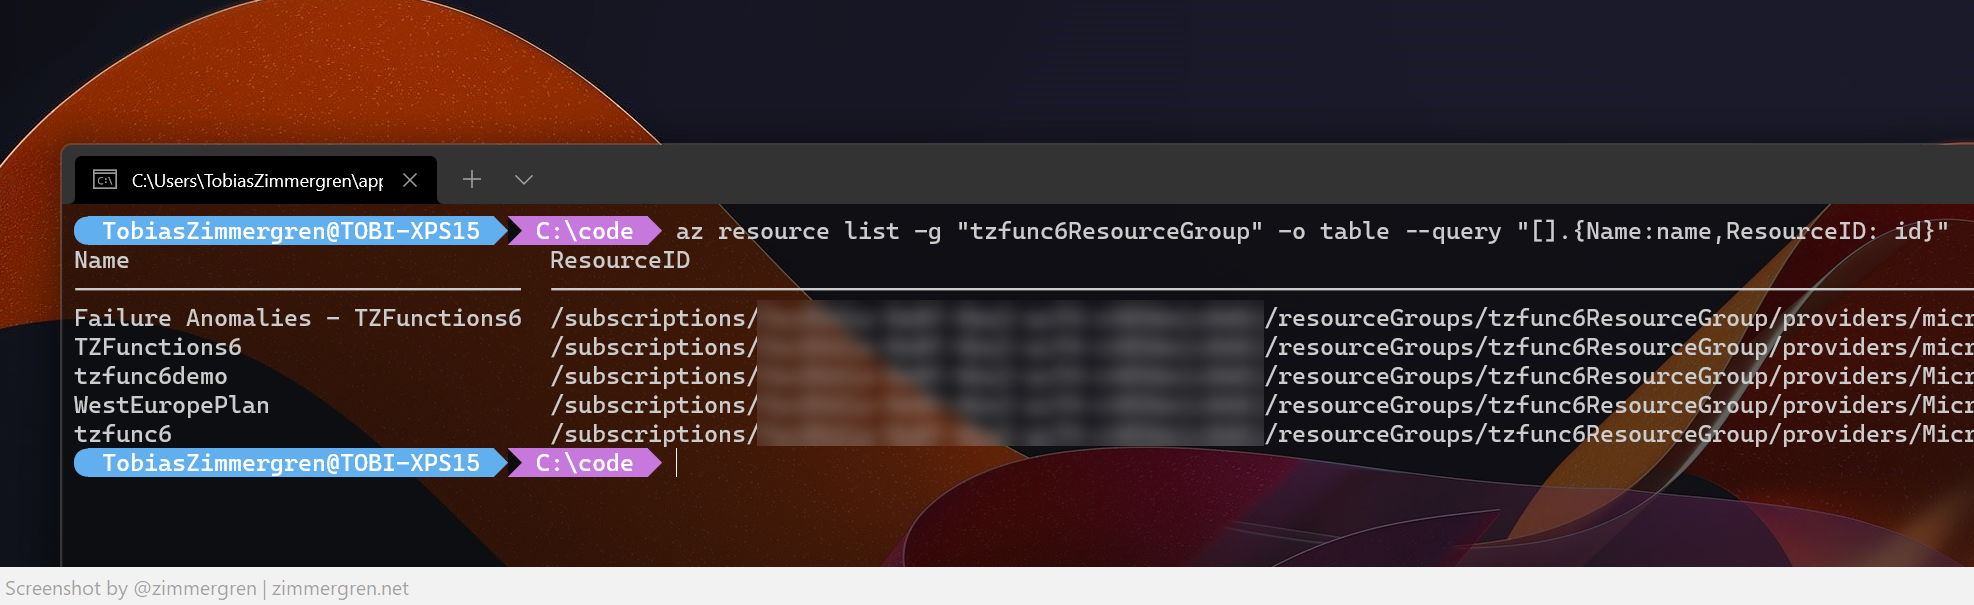
Use the Azure CLI to get a Resource ID for an Azure resource.
Troubleshooting
Using the Bicep extension to generate the templates can generate error messages, and they are not always easy to interpret.
Here are some of the issues I encountered, and how to work around them.
Error: Failed to parse supplied resourceId ""
This is the easy one. You likely have a typo in the resource ID. Make sure you correct it, and then try again.
Error: The ChainedTokenCredential failed
This error message was a bit trickier, but it hinted about the credentials.
Caught exception fetching resource: The ChainedTokenCredential failed due to an unhandled exception: Azure CLI authentication timed out.
I was correctly signed into the Azure account extensions using the same account as I used to generate templates. It still failed.
Workaround, which worked on 3 of my machines:
- Sign in to Azure in Visual Studio code with the correct account.
- Open the PowerShell/command window.
- Sign in with the same account using the Azure CLI.
- Voila - Visual Studio Code now understands the credential context.
Perhaps this one wasn’t obvious from the error message, but now it works, and I can quickly generate all the templates I need.
Comments are closed