Website security scanning with GitHub Actions and OWASP ZAP
Security is a topic that should be on top of everyone's mind. Particularly security in software is vital, given the enormous growth in threats targeting online resources.
I previously wrote about other developer-oriented security aspects that you might find interesting:
- Embrace a Security Development Lifecycle (SDL) for Azure
- Automate Azure DevOps code security analysis with MSCA
Today I want to highlight another approach: vulnerability checks on systems running in the cloud or on your servers. That is, not during development, but in the system where they are operating.
In this post, I'm discussing how we can do this using GitHub Actions and the OWASP ZAP scanner. You can also run this tool stand-alone, or through Azure DevOps. However, today we're looking at it from the GitHub Actions angle.
Tag along.
Introduction
Let's first dive into what a Web Application Vulnerability Scanner is, and then get started with GitHub Actions and web app vulnerability scanning using OWASP ZAP.
DAST - Dynamic Application Security Testing
Software testing comes in many forms. Usually, we refer to DAST and SAST when it comes to security testing. These are, respectively:
- Dynamic Application Security Testing (DAST).
- Static Application Security Testing (SAST).
In short, SAST analyzes source code, design, and flaws in architecture. With DAST, however, we do operational testing. We can test an application's behavior, inject common threats, and more - this is only possible if you have the source code deployed somewhere already.
With the OWASP ZAP scanner, we can perform DAST testing of common web threats, and test the security posture of our applications where they operate.
- Read more about DAST.
OWASP ZAP for Web Application Vulnerability Scanning
There are many tools available for security vulnerability testing. When it comes to testing the security of your applications, more is merrier.
One of the tools provided for free, and open-source, is the OWASP ZAP.
Security testing with ZAP is essentially a way to target your web applications and let the tool perform attacks with various patterns.

The documentation on the official website covers a lot about the OWASP ZAP already. Therefore, I will instead focus on configuring your GitHub Actions to automate vulnerability checks for your website in your CI/CD pipelines.
Perform security checks using GitHub Actions
To demonstrate how we can automate security vulnerability testing with the OWASP Zed Attack Proxy, I want to make use of GitHub Actions.
Most of the code I write is proprietary, and never see the light of day on GitHub. However, to benefit the greater community, I want to share how to set up security vulnerability tests for your open (or closed) source projects.
Tag along. It's easy.
Create a new GitHub Action
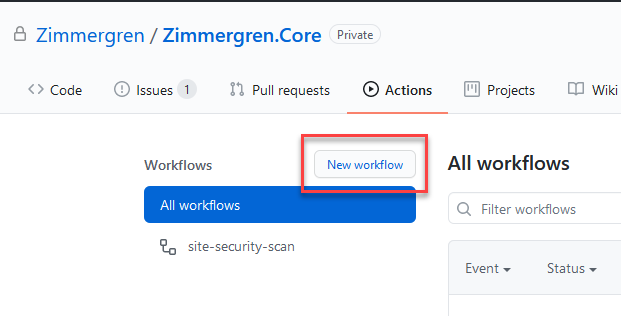
From the repository in GitHub, select "New workflow":
I am creating mine from ground-up, so let's select "set up a workflow yourself":

From here, we can either drop our YAML magic right into the editor or use the GitHub Marketplace for Actions. I will use the latter, as I want to achieve only a single thing right now, which is to run my vulnerability scanners.
Select an item from the GitHub Actions Marketplace
Depending on your requirements, you can opt-in to run either the OWASP ZAP Full Scan or the Baseline Scan. I'll go with the Baseline scan for this example.
In the Marketplace search box, enter "owasp," and select the one you want:
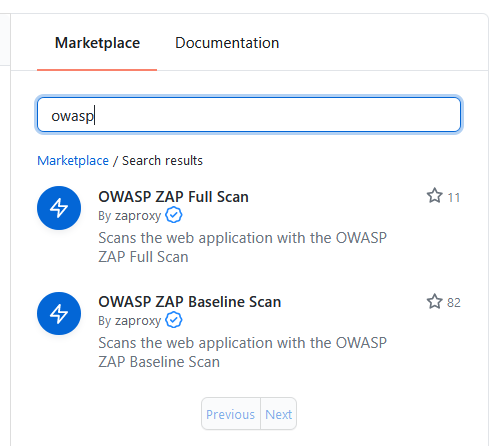
Then, click the copy button to copy the code snippet, so you can directly paste it into the editor.
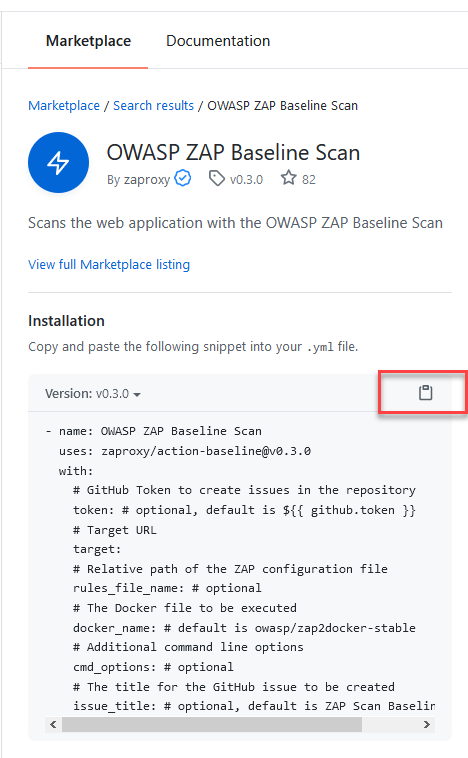
Here's what my complete and simple YAML looks like now.
name: site-security-scan
on:
  push:
    branches: [ master ]
  pull_request:
    branches: [ master ]

jobs:
  build:
    runs-on: ubuntu-latest
    steps:
    - name: OWASP ZAP Baseline Scan
      uses: zaproxy/action-baseline@v0.3.0
      with:
        target: "https://your-website.com/"
Things to make a note of:
- name: This name appears on any badges, and in the UI. A good title helps to understand what it is.
- I've removed some of the default configurations, as they are optional and will use standard values.
- The "target" should be the website where you want to perform a vulnerability assessment.
Okay. We have our YAML. We have our GitHub Action ready to get something done. Click "Start commit":
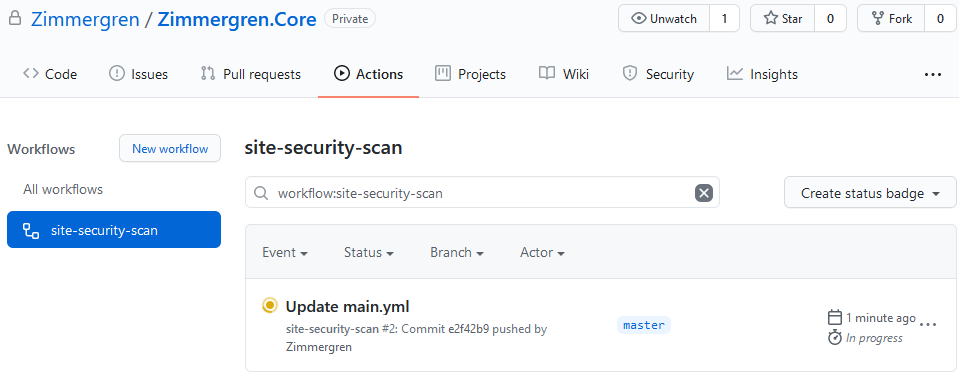
Next, we head over to "Actions," and can see a few things:
- site-security-scan: this is your name mentioned in the YAML.
- It is "In progress."
- Let's click it!
See the "build" menu item in the navigation, and you can see the workflow's output logs:
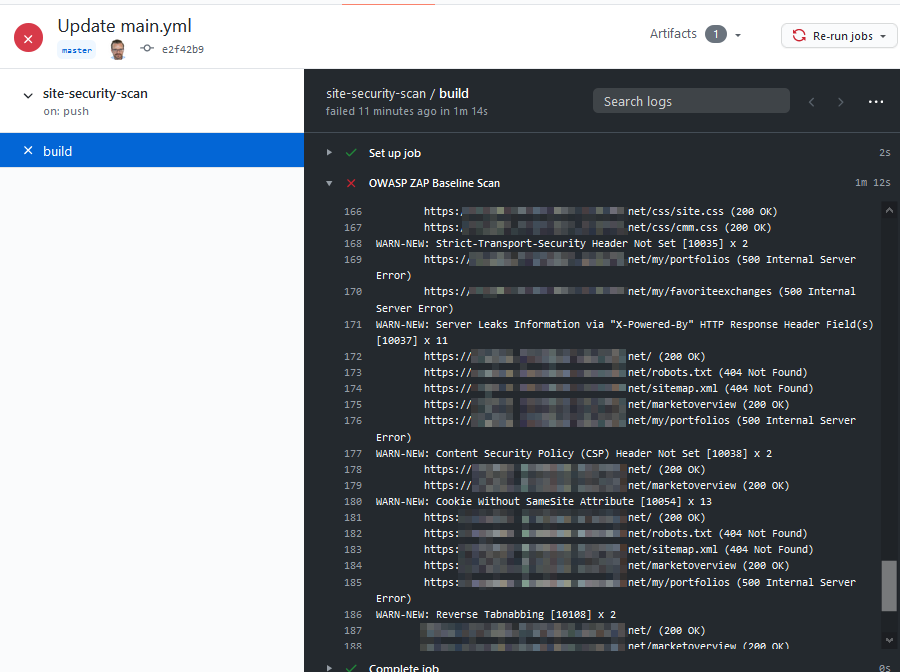
Great - but does it persist this as a report somewhere for me to fix?
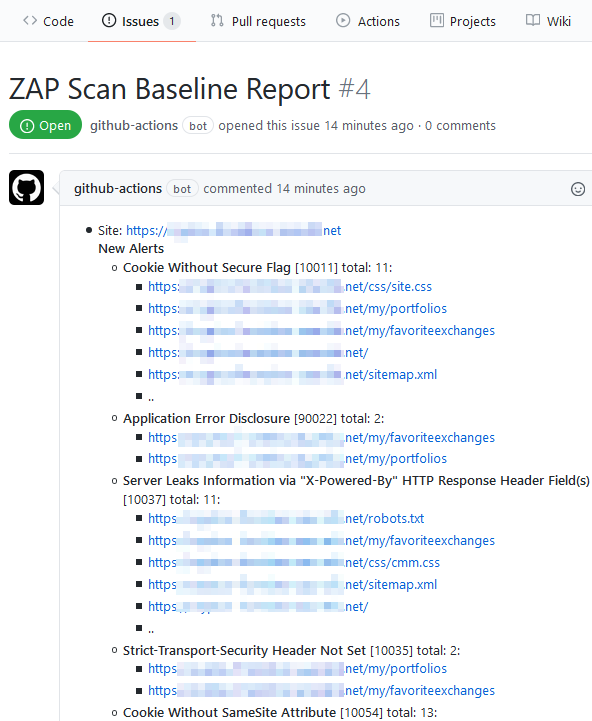
It sure does. If you head over to "Issues," you will get a detailed report of new alerts:
Create a badge
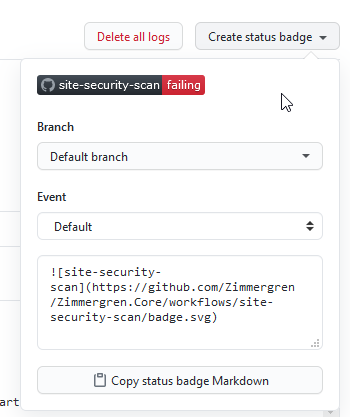
Because visual indicators are important, I also want to create a fancy badge that I can add to my repository landing page. You can select "Create status badge":
Download the Artifacts (Reports)
Getting a list of new issues and any logs in the UI is great. However, sometimes you need to integrate with other systems or digest the information in another way outside of GitHub.
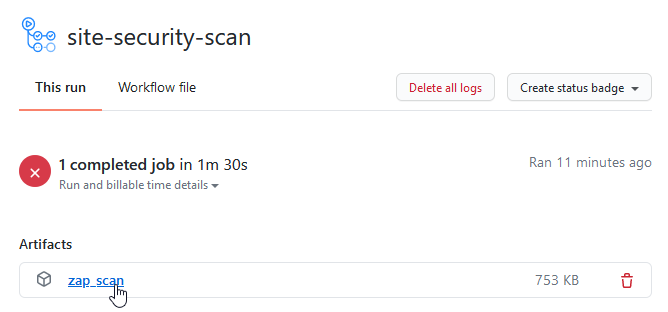
The OWASP ZAP scan produces a "zap_scan" zip file, containing all security assessment reports. Click it to download.
The report comes in three flavors.
- HTML
- JSON
- Markdown
Let's take a peek.
HTML Report
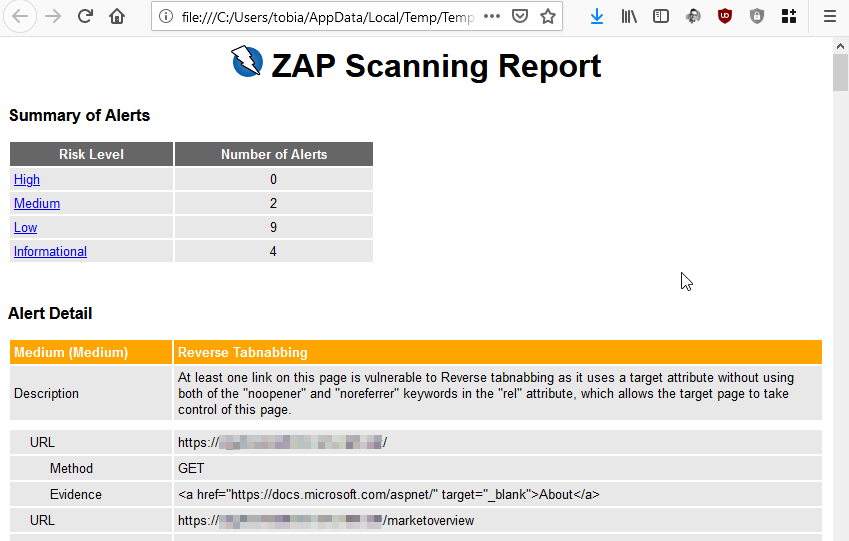
Here is what the report looks like in HTML. This report helps me quickly get an overview and read the information in a friendly format.
JSON Report
The JSON file is formatted as below. You can digest it in whatever preferred tool or option you want from here. Integrate it into existing platforms and tools, send it to your dev team to look at, or render your custom charts based on the data. You have all the options in the world here.
{
    "@version": "2.9.0",
    "@generated": "Mon, 13 Jul 2020 18:04:16",
    "site": [
        {
            "@name": "https://tobias-redacted-website.net",
            "@host": "tobias-redacted-website.net",
            "@port": "443",
            "@ssl": "true",
            "alerts": [
                {
                    "pluginid": "10011",
                    "alert": "Cookie Without Secure Flag",
                    "name": "Cookie Without Secure Flag",
                    "riskcode": "1",
                    "confidence": "2",
                    "riskdesc": "Low (Medium)",
                    "desc": "<p>A cookie has been set without the secure flag, which means that the cookie can be accessed via unencrypted connections.<\/p>",
                    "instances": [
                        {
                            "uri": "https://tobias-redacted-website.net/css/site.css",
                            "method": "GET",
                            "param": "ARRAffinity",
                            "evidence": "Set-Cookie: ARRAffinity"
                        },
                        {
                            "uri": "https://tobias-redacted-website.net/my/portfolios",
                            "method": "GET",
                            "param": "ARRAffinity",
                            "evidence": "Set-Cookie: ARRAffinity"
                        },
                        {
                            "uri": "https://tobias-redacted-website.net/my/favoriteexchanges",
                            "method": "GET",
                            "param": "ARRAffinity",
                            "evidence": "Set-Cookie: ARRAffinity"
                        },
                        {
                            "uri": "https://tobias-redacted-website.net/",
                            "method": "GET",
                            "param": "ARRAffinity",
                            "evidence": "Set-Cookie: ARRAffinity"
                        },
// Example only, the rest is commented out.
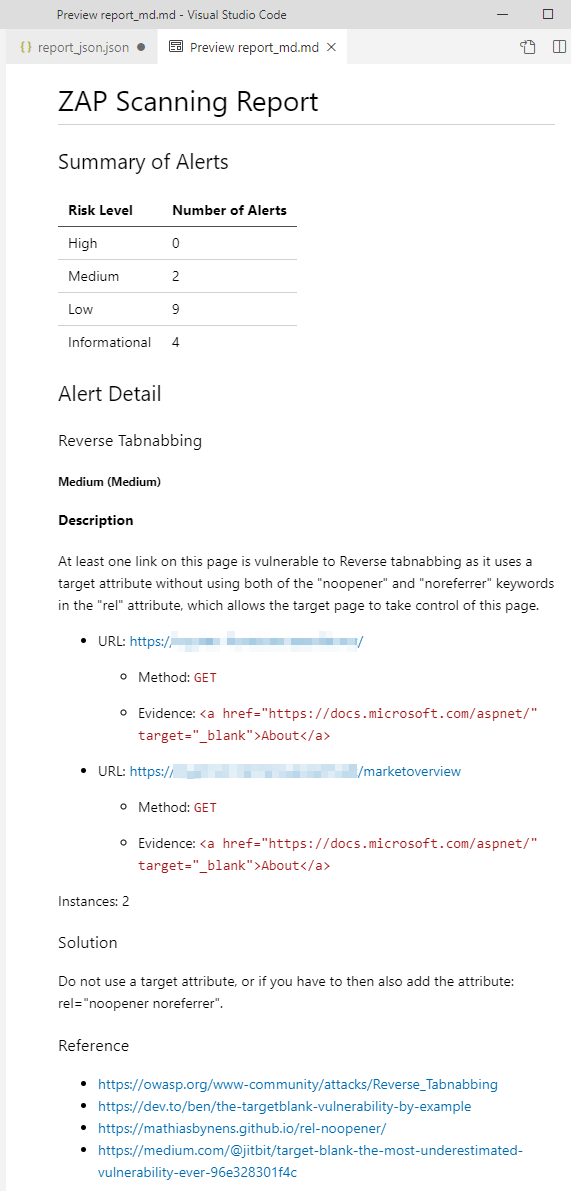
Markdown report
The Markdown report looks like this. It's a bit more simplistic, but ideal if you need to quickly get some contents from the report into an md-based system (like GitHub).
Summary
In this post, we had a look at how to create a new GitHub Action, use the GitHub Marketplace to target and make use of the OWASP scanners, and see the results in our CI/CD pipeline.
We could also look at the output reports, which is where we'll find the real juicy bits.
Recommended links about GitHub Actions.
- GitHub Actions (GitHub)
- GitHub Actions Documentation (GitHub Docs)
Recommended links about OWASP ZAP.




Recent comments