
This article is part of a series. Here’s a list of all available parts.
- Part 0: Introduction to the article series
- Part 1: Create an AzureRm Active Directory (AAD) Application using PowerShell
- Part 2: Getting started with the AzureRm PowerShell cmdlets
- Part 3: Build an application using C# which is using the Azure Resource Manager API’s
- Part 4: Tip: Azure Resource Explorer Tool
- Part 5: Tip: Get all available api-version alternatives for the ARM endpoints
- Part 6: Move Azure Resources from one Resource Group to another
- Part 7: Download an Azure Publishing Profile (xml) programmatically using REST
- Part 8: Programmatically export Resource Group template using the REST API
Introduction
Welcome to Part 3 in the Developing with Azure Resource Manager series. In the first part we took a look at what is required to set up the proper authentication in order for us to start developing with ARM.
In this article we will take a look at how we can utilize C# and the new Microsoft.Azure.ResourceManager NuGet packages to abstract away all the REST API endpoints.
The reason that I want to highlight the C# NuGet packages is that it is a lot easier to build an application using these wrapper classes for the API rather than creating your own REST wrappers and methods. I will cover the REST API calls in another post though.
Tag along for the ride and learn how to use C# and the Azure Resource Manager.
Install the required NuGet packages
As of this writing, this package was released 3 (three) days ago, so it’s fresh out of the oven and as such (being a preview) there will most likely be changes both to the package and to this article.
Should you encounter something in this post that doesn’t work anymore, please contact me and I’ll update!
Let’s start by installing the NuGet package. You can do this either by running the NuGet Packager Console, and entering this command:
Install-Package Microsoft.Azure.ResourceManager -Pre
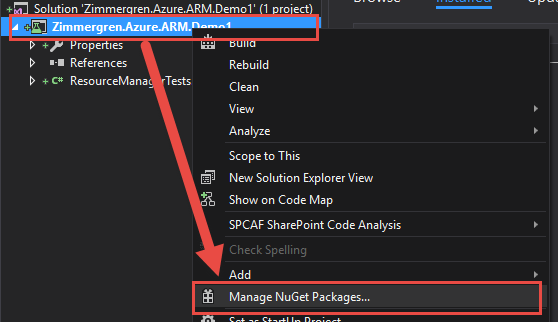
… Or you can take the visual approach and launch the “Manage NuGet Packages…” menu from your project context menu:
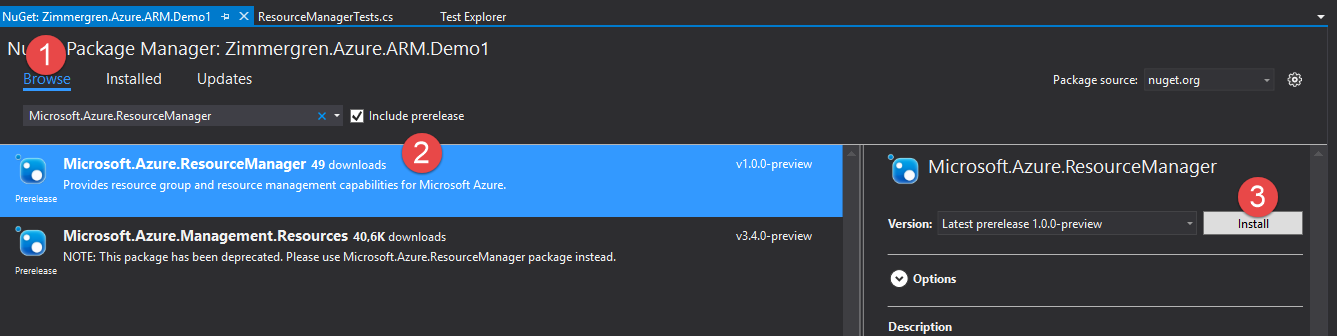
Search for Microsoft.Azure.ResourceManager in the Browse tab, select the Microsoft.Azure.ResourceManager package and click Install. Make sure the checkbox “Include prerelease” is ticked. (Today as of this writing that’s version 1.0.0-preview):
Great, now that you know how that works - do the same thing for the following package:
Microsoft.IdentityModel.Clients.ActiveDirectory (Get the latest pre-release version. Today as of this writing that’s version 3.9.302111717-alpha).
Done. You should now have all the required assemblies in your project. Moving on.
Bring out the bat - time to code
In the following sections I’ll outline the overall steps for authenticating and then issuing requests to the Azure Resource Manager API using the C# classes provided by the NuGet package.
Add some variables for our code to work with.
First things first. See Part 1 in this article series about setting up a Service Principal account, and getting the variables/guids for your azure environment. These are required to continue below.
    private const string ClientId = "ApplicationGUID";
    private const string ServicePrincipalPassword = "Password";
    private const string AzureTenantId = "AzureTenantGUID";
    private const string AzureSubscriptionId = "AzureSubscriptionGUID";

    private static string AuthToken { get; set; }
    private static TokenCredentials TokenCredentials { get; set; }
    private static string ResourceGroupName { get; set; }
A few things to note:
- Never, ever store username, passwords or other sensitive data in your code like in this demo. I’m doing this for simplicity and for easy demonstration.
- Never forget or neglect the above bullet point, thank you :-)
Here’s what the variables should contain:
- ClientId: This is the ApplicationId for your AAD Application.
- ServicePrincipalPassword: This is the password for your service principal.
- AzureTenantId: This is actually the Directory ID of your AAD.
- AzureSubscriptionId: Your Azure Subscription Id.
Authentication: Create the basic requests for Access Tokens
In order to even be able to make any requests to the API we need to authenticate and authorize our request. Let’s create a nice method for this, like so:
    private static string GetAuthorizationToken()
    {
        ClientCredential cc = new ClientCredential(ClientId, ServicePrincipalPassword);
        var context = new AuthenticationContext("https://login.windows.net/" + AzureTenantId);
        var result = context.AcquireTokenAsync("https://management.azure.com/", cc);
        if (result == null)
        {
            throw new InvalidOperationException("Failed to obtain the JWT token");
        }

        return result.Result.AccessToken;
    }
You can see in this method that we’re refering to the ClientId and ServicePrincipalPassword in order to create the ClientCredential object. Next we’re creating an AuthenticationContext which points to our Azure Tenant and finally requesting the auth token.
Now you can call the above method in order to get an AccessToken which is required to construct a proper TokenCredentials object which we are going to do. This would look somethig like this:
AuthToken = GetAuthorizationToken();
TokenCredentials = new TokenCredentials(AuthToken);
Build something with the Azure Resource Manager C# classes
Alright, you’ve come this far and you’re now properly authenticated and have a valid access token and TokenCredentials object.
With this, we can easily call the classes in the Microsoft.Azure.Management.Resources namespace. Let’s build something simple to start off.
Code Sample 1: Creating an Azure Resource Group using C#
Let’s start off by just creating a resource group, simple as it is, using the C# classes.
Create a method like this:
private void CreateAzureResourceGroup()
{
    var resourceManagementClient = new ResourceManagementClient(TokenCredentials){
        SubscriptionId = AzureSubscriptionId
    };

    var resourceGroup = new ResourceGroup
    {
        Location = "North Europe",
        Tags = new Dictionary<string, string>
        {
            {"CustomerId", "DummyId-123" },
            {"CustomerEmail","tobias@zimmergren.net" },
            {"MagicalUnicorns","Are Awesome" }
        }
    };

    var resourceGroupResult =
        resourceManagementClient.ResourceGroups.CreateOrUpdate("Zimmergren.ARM.ResourceGroupDemo-123",
            resourceGroup);

}
Things to note:
- We authenticate with a
ResourceManagementClientand pass theTokenCredentials - We set the
SubscriptionIdon the resourceManagementClient object - We create a new
ResourceGroup - We set a few simple properties (Location, Tags)
- We send the request using
resourceManagementClient.ResourceGroups.CreateOrUpdate()which will either create a new resource group, or update an existing one.
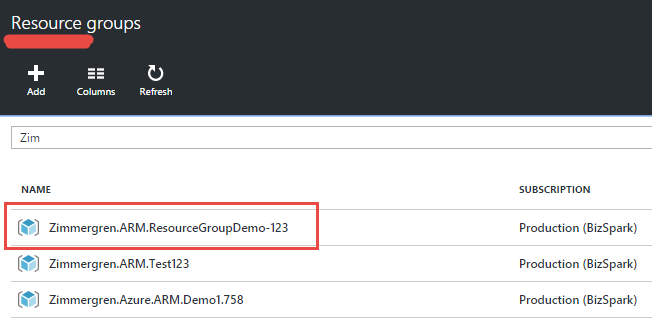
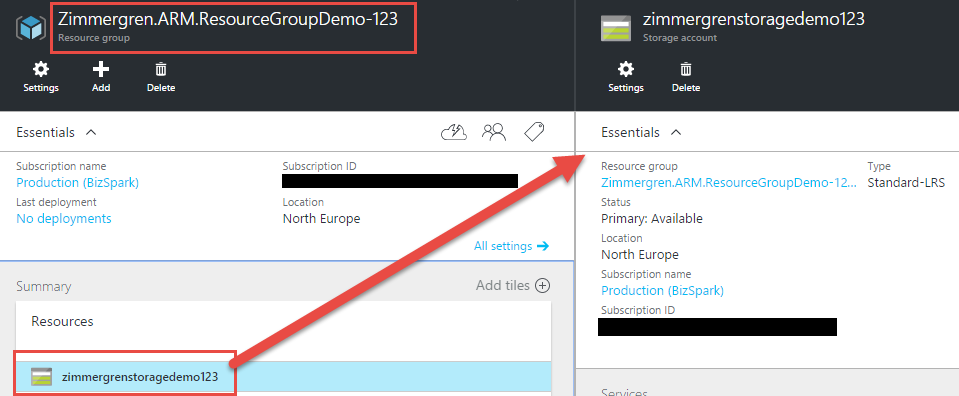
In your Azure Portal, you should now see your resource group:
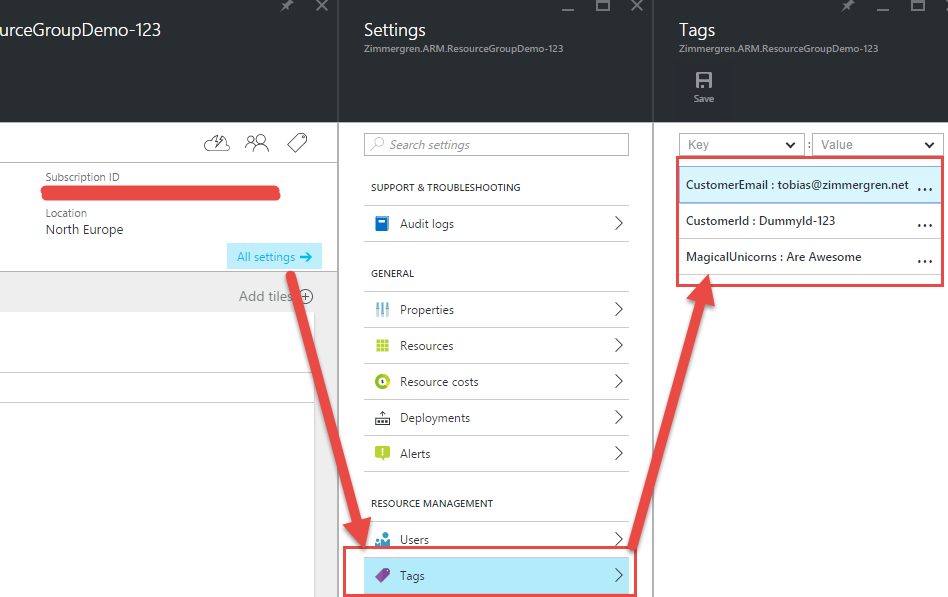
You can also expand this object and make sure the Tags property worked and has configured our tags as per the code snippet:
Code Sample 2: Retrieve a deployed Resource Group using C#
We know how to create a basic resource group. Now we want to retrieve one instead. Here’s how:
private void GetAzureResourceGroup()
{
    var resourceManagementClient = new ResourceManagementClient(TokenCredentials)
    {
        SubscriptionId = AzureSubscriptionId
    };

    var resourceGroup = resourceManagementClient.ResourceGroups.Get("Zimmergren.ARM.ResourceGroupDemo-123");

    Debug.WriteLine("Id: {0}", resourceGroup.Id);
    Debug.WriteLine("Location: {0}", resourceGroup.Location);
    Debug.WriteLine("Name: {0}", resourceGroup.Name);
}
This will simply give you the ResourceGroup object associated with the actual resource group you’re fetching. In my case it’s the Zimmergren.ARM.ResourceGroupDemo-123 group as shown previously.
Code Sample 3: Create a Storage Account inside the Resource Group using C#
At this point we can both Create/Update and Read Azure Resource Groups. But what good does that do if we don’t have any services running inside of them?
In order for our code to work directly with the Storage Accounts, we need to include a new NuGet package:
Install-Package Microsoft.Azure.Management.Storage -Pre
Make sure to include the -Pre switch to ensure you’re getting the preview package.
Important note: In order to add services to a resource group, we need to add the provider for it first. That’s what the resourceManagementClient.Providers.Register() method does in the code sample.
Let’s check out how we can create a Storage Account inside the Resource Group:
private void CreateStorageAccount()
{
    var resourceManagementClient = new ResourceManagementClient(TokenCredentials)
    {
        SubscriptionId = AzureSubscriptionId
    };

    // Add a Microsoft.Storage provider to the subscription.
    var storageProvider = resourceManagementClient.Providers.Register("Microsoft.Storage");


    // Auth..
    var storageManagementClient = new StorageManagementClient(TokenCredentials)
    {
        SubscriptionId = AzureSubscriptionId
    };

    // Your new awesome storage account.
    var storageAccount = storageManagementClient.StorageAccounts.Create(
        "Zimmergren.ARM.ResourceGroupDemo-123",
        "Zimmergren.ARM.STORAGE-DEMO",
        new StorageAccountCreateParameters()
        {
            Location = "North Europe",
            AccountType = AccountType.StandardLRS
        }
    );

    Debug.WriteLine(storageAccount.ProvisioningState);
}
If everythig went well, you have created a new Storage Account -INSIDE- the Resource Group you created before:
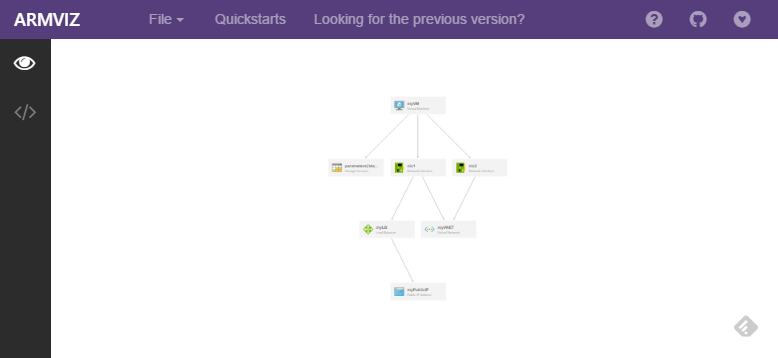
Code is cool, but provisioning or deployment templates are cooler
As you can see it’s rather easy to work with these frameworks as long as you’ve properly configured authentication and permissions. But from where I sit, I would rather have a deployment- or provisioning template of sorts so I could update a single template for all my resources instead of update the code in various places as soon as we need to change something.
This is where the Azure Deployment Templates comes in handy. We will investigate those a bit in another post in this series soon.
Code Tip: Additional NuGet packages
There’s NuGet packages available for more than the Storage Account of course. Here’s a list of some of the packages that you will find very useful for deploying things throuh the Azure Resource Manager API:
- Microsoft.Azure.Management.Storage NuGet
- Microsoft.Azure.Management.Compute NuGet
- Microsoft.Azure.Management.Network NuGet
- Microsoft.Azure.Management.WebSites NuGet
- Microsoft.Azure.Management.Cdn NuGet
Summary
In this post we took a look at how we could utilize the .NET framework to perform various tasks with the Azure Resource Manager API’s instead of using PowerShell like we checked out in previous articles.
Things we’ve checked out:
- Use available NuGet packages for easier working with the Azure Resource Manager API
- Use C# to Authenticate to the ARM
- Use C# to work with Resource Groups, Storage etc.
With that said, there’s a world of opportunities with these nuget packages and you can go right ahead and dive into them yourself to find out more.
As for maintaining a good CI and deployment structure for your services in Azure, I would go down the route of using Azure Resource Templates instead of a code-only approach.
Enjoy.
Tobias Zimmergren.
Comments are closed
Archived comments
Hi Tobias, can you please confirm what type of visual studio project you used for this project? Also, would it be possible for you to share a working project file (without any subscription information)? I can't my project to work based on the code in article. Cheers, Amanda
Hi Amanda,
You can use any type of project. I am using a class library, which is called from my other services and projects. Unfortunately I don't have a full project ready to be shared, since most of the code I'm using is part of actual projects (except for the snippets in the blog post).
However, please do share what problems you are encountering and let's see if we can figure it out.
Tobias.
Essentially what we would like to do is to be able to control and create Azure resources from within our own management portal (Azure Web App with AAD Authentication). I noticed a lot of the tutorials for ARM use console applications to create Azure resources so I was wondering if that was my issue (clutching at straws now)? The project I want to add this function to is an asp.net web application. I've gone back to basics because the more I try to get it to work the further away I get from my end goal. It's odd because there is loads of online documentation on using ARM and ARM Authentication but I seem to hit the same kinds of problems no matter which way I try to do it. First I was getting access denied errors and now I get no error at all but the resource is never created. Any hints, tips or pointers would be greatly appreciated :) Amanda
Thank you, the writeup solved my problem. I used wrong URLs in the AuthenticationContext and AcquireTokenAsync arguments. Can I ask where did you get the URLs "https://login.windows.net/" and "https://management.azure.com/" from? Like where are they documented?
Hey aki,
I'm glad I could help.
There's a lot of resources available for the endpoints and authentication, here's a good few starting points:
- https://azure.microsoft.com...
- https://msdn.microsoft.com/...
- http://www.dushyantgill.com...
Cheers,
Tobias.
Thanks for the great writeup, I'm trying to restart a webapp using the AzureResourceManager,
I can succsfully retrive a webapp with :
GenericResource foo = myClient.Resources.Get("MY_RESOURCE_GROUP", "Microsoft.Web","" ,"sites" ,"MY_SITE" ,"2015-08-01");
How can I do the equivalent of the following POST request :
https://management.azure.co...
using the AzureResourceManager ?
every thing works for me perfectly, well explained thank you for your guidance, i ha ve a question is ti possible to get a webApp information like instaces IDs, endpoints ... ?
Hi, I always get this error :( The received access token is not valid: at least one of the claims 'puid' or 'altsecid' or 'oid' should be present.
Great tutorial! How would you recommend storing the credentials required to retrieve the token? I don't want to hard code them and my application doesn't have access to a database.
Hey Jeff,
There's many ways depending on your project type. If it's an application hosted securely on a server, you can use project settings (app.config, web.config or project.json if it's a C# project for example).
For sensitive data, it's always recommended to have a secure storage mechanism in place. One of those also exist in Azure and is called Azure Key Vault. I use this for storing sensitive tokens and credentials, and then I store the access keys to it on the secure servers accessible through the application config files only.
So:
1) Key Vault is a good idea.
2) If no keyvault, you can store them in the application configuration section (app.config, web.config, project.json)
3) Plenty of other options available, depending on your own variables
Hope this helps :-)
Tobias.
Great info, thanks! KeyVault sounds like what I'll go with. If you have any experience with creating virtual machines using a custom image please take a look at this issue I'm having: http://stackoverflow.com/qu...
Message='authority' Uri should have at least one segment in the path (i.e. https://<host>/<path>/...)
Parameter name: authority
I keep getting the above error on line
var context = new AuthenticationContext("https://login.windows.net/" + AzureTenantId);
Hello.
I encountered a problem with this line:
var storageManagementClient = new StorageManagementClient(TokenCredentials)...
I cannot pass Microsoft.Rest.TokenCredentials type to Microsoft.Azure.Management.Storage.StorageManagementClient constructor, because it accepts Microsoft.Azure.SubscriptionCloudCredentials
What's wrong? Please, help.
Found problems. In Microsoft :)
They have 13 last versions of Microsoft.Azure.Management.Storage as preview!
https://www.nuget.org/packa...
And Paket dependency manager does not install them, it installs only last stable version (3.0). And they had breaking change in Microsoft.Azure.Management.Storage.StorageManagementClient public constructor since that version.